Understanding Your Growing Zone
Before you can plan what to plant when, you need to understand the climate conditions specific to your location. The USDA Plant Hardiness Zone Map divides North America into thirteen zones based on average annual minimum winter temperature. Each zone represents a ten-degree Fahrenheit range, and zones are further divided into "a" and "b" halves. Knowing your zone tells you which perennial plants will survive your winters, but for vegetable gardening, the more important information is your frost dates.
Your last spring frost date is the average date of the last freeze in spring. Your first fall frost date is the average date of the first freeze in fall. The period between these two dates is your frost-free growing season. In zone 3, the growing season may be only ninety days. In zone 9, it can exceed two hundred and seventy days. These dates determine when you can safely plant warm-season crops outdoors and when you need to protect or harvest tender plants before frost kills them.
You can find your frost dates through your local agricultural extension service, online frost date calculators, or the USDA zone map. Once you know your frost dates, you can count backward and forward to determine the ideal planting windows for every crop you want to grow. This is the foundation of all seasonal garden planning. For help getting your garden started from scratch, see our guide on how to start a vegetable garden from scratch.
Microclimates within your own property also matter. A south-facing wall radiates stored heat and creates a warmer zone suitable for heat-loving crops. A low-lying area collects cold air and experiences frost earlier in fall and later in spring than the surrounding ground. A windy hilltop dries out faster and experiences more wind chill than a sheltered valley. Observing these microclimates on your property and matching crops to them gives you a significant advantage in extending your growing season.
Cool-Season vs. Warm-Season Crops
Every vegetable falls into one of two categories based on its temperature preferences. Understanding this distinction is the key to successful seasonal planning.
Cool-Season Crops
Cool-season crops thrive in temperatures between 40 and 70 degrees Fahrenheit. They germinate in cool soil, tolerate light frost, and actually produce better-tasting harvests in cool weather. Many cool-season crops become bitter, tough, or bolt to seed when temperatures exceed eighty degrees. Cool-season crops are planted in early spring, four to six weeks before the last frost date, and again in late summer for a fall harvest. In mild climates (zones 7 and above), cool-season crops can be grown through the winter as well.
Cool-season crops include lettuce, spinach, kale, Swiss chard, arugula, peas, broccoli, cauliflower, cabbage, Brussels sprouts, carrots, beets, radishes, turnips, onions, garlic, potatoes, and many herbs like cilantro, dill, and parsley. These are the crops that get your garden producing early in the year when warm-season crops are still weeks away from being plantable.
Warm-Season Crops
Warm-season crops need soil temperatures above sixty degrees Fahrenheit to germinate and air temperatures between seventy and ninety degrees to grow well. They are killed by frost and should not be planted outdoors until all danger of frost has passed and the soil has warmed. Starting warm-season crops indoors four to eight weeks before the last frost date gives you a head start on the season.
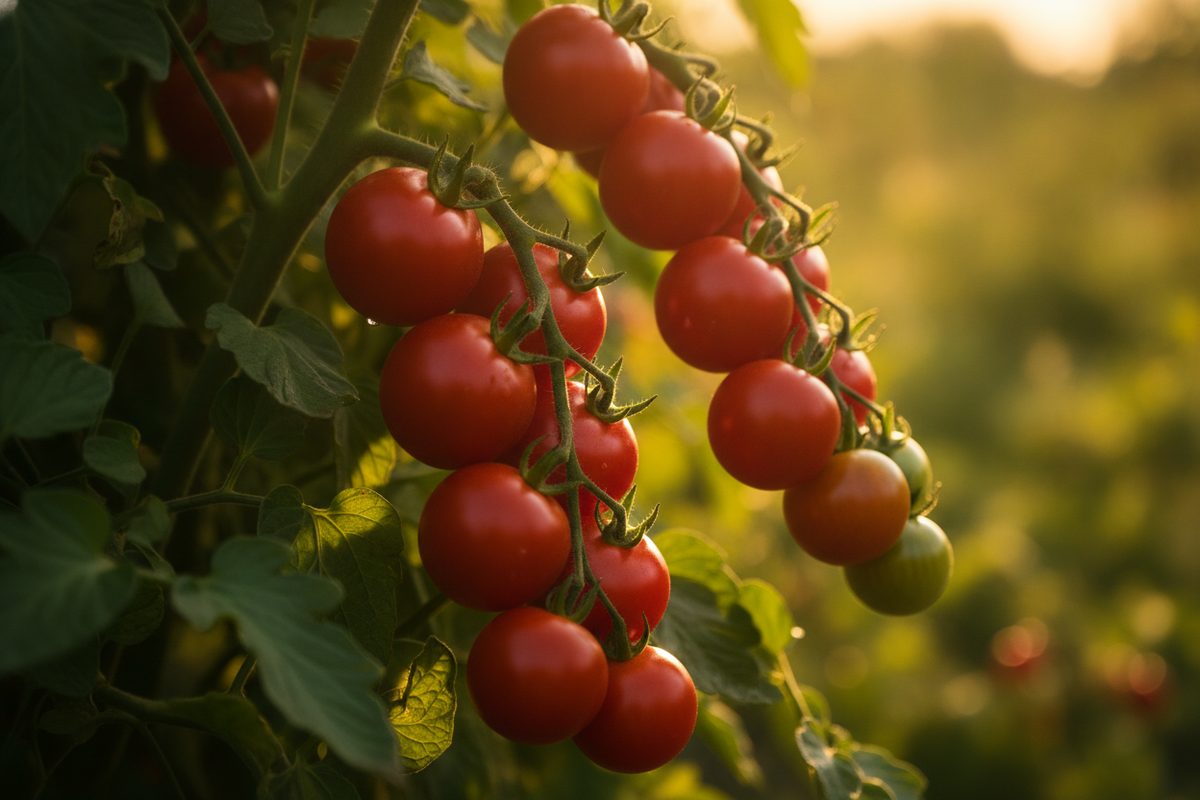
Warm-season crops include tomatoes, peppers, eggplant, cucumbers, squash, zucchini, melons, watermelons, corn, beans, okra, sweet potatoes, and basil. These crops produce the bulk of the summer harvest and are the primary focus of most home vegetable gardens. For detailed guidance on growing the most popular warm-season crop, read our beginner's guide to growing tomatoes.
Cool-Season vs. Warm-Season Comparison
This table summarizes the key differences between the two crop categories.
| Characteristic | Cool-Season Crops | Warm-Season Crops |
|---|---|---|
| Ideal temperature range | 40–70°F | 70–90°F |
| Frost tolerance | Tolerate light to moderate frost | Killed by frost |
| Soil temp for germination | 40–50°F | 60–85°F |
| When to plant | 4–6 weeks before last frost; late summer for fall | After all frost danger; soil above 60°F |
| Harvest quality in heat | Bolts, turns bitter, poor quality | Thrives and produces abundantly |
| Example crops | Lettuce, peas, broccoli, carrots, spinach | Tomatoes, peppers, squash, corn, beans |
| Growing season | Spring and fall (or winter in mild climates) | Late spring through summer |
| Indoor starting | Optional; most direct-sow well | Recommended 4–8 weeks before transplant |
Month-by-Month Planting Guide
This guide is written for USDA zones 5 through 7, which covers a large portion of the United States. Adjust timing by two to three weeks earlier for warmer zones and two to three weeks later for colder zones. Always check your specific frost dates for the most accurate timing.
January
January is planning month for most gardeners in zones 5 through 7. The ground is frozen, the garden is dormant, and this is the perfect time to order seeds, plan your layout, and prepare your equipment. Review last year's garden journal, note what worked and what did not, and sketch out this year's plan. Order seeds early, as popular varieties sell out quickly. Start onion seeds indoors under grow lights this month, as onions need a long growing season. If you want to get a jump on the season, you can also start leeks and early celery indoors.
February
Seed starting ramps up in February. Start broccoli, cauliflower, cabbage, and Brussels sprouts indoors six to eight weeks before your last frost date. These brassicas benefit from an early start and transplant well. Toward the end of the month, you can also start lettuce and spinach indoors for transplanting later. Check your grow lights and seed starting supplies, and make sure you have fresh seed starting mix on hand. Begin hardening off any seedlings that are large enough to move outdoors on warm days.
March
March is when outdoor planting begins in earnest. As soon as the soil is workable, direct-sow peas, spinach, lettuce, radishes, carrots, beets, and turnips. These cool-season crops can handle soil temperatures as low as forty degrees. Plant onion sets and seed potatoes as soon as the ground can be worked. Continue starting warm-season crops like tomatoes, peppers, and eggplant indoors. Towards the end of the month, in warmer zones, you can begin transplanting hardened-off brassica seedlings outdoors. This is also a good time to prepare your beds by working in homemade compost and checking your soil condition.
April
April is one of the busiest months in the garden. Continue direct-sowing cool-season crops and transplant broccoli, cauliflower, and cabbage seedlings outdoors. Start cucumbers, squash, melons, and pumpkins indoors three to four weeks before your last frost date. Begin hardening off tomato and pepper seedlings for transplanting next month. succession-sow lettuce and radishes every two weeks for a continuous harvest. Plant a second crop of peas if you have space. If you are also growing herbs indoors, begin moving them outside on warm days for acclimation.
May
May is transplant month. After your last frost date has passed and nighttime temperatures are consistently above fifty degrees, transplant tomatoes, peppers, eggplant, and other warm-season seedlings into the garden. Direct-sow beans, corn, cucumbers, squash, and melons. Plant sweet potato slips once the soil has warmed to sixty-five degrees. This is also the month to apply a thick layer of mulch around all your plants, as outlined in our complete mulching guide. succession-sow lettuce, radishes, and bush beans every two to three weeks.
June
By June, the garden should be in full growth mode. Continue succession planting fast-mowing crops like lettuce, radishes, and bush beans. Start seeds for fall broccoli, cauliflower, and cabbage indoors mid-month, as these need to go out in late July or August. Side-dress heavy feeding crops like tomatoes, corn, and squash with compost or organic fertilizer. Begin training vining plants onto trellises and stakes. Monitor for pests and diseases and address problems early. If you have not already, set up efficient irrigation to keep up with increasing water needs. Our guide on watering efficiently covers the best methods.
July
July is harvest month for many cool-season crops. Pull spent pea vines and bolted lettuce to make room for fall plantings. Direct-sow fall carrots, beets, turnips, and rutabagas in mid to late July. Transplant fall broccoli and cauliflower seedlings started in June. Continue harvesting summer crops at their peak. Watch for heat stress on plants and provide shade cloth for lettuce and other cool-season crops that are still producing. Succession-sow bush beans one final time for a late summer harvest.
August
August is the critical month for establishing your fall garden. Transplant fall brassicas into the garden. Direct-sow quick-maturing crops like arugula, spinach, lettuce, and radishes for fall harvest. Start garlic planning by preparing beds for October planting. Continue harvesting summer crops heavily. Begin preserving surplus harvests by freezing, canning, or dehydrating. Start winding down spent summer crops and incorporating the residues into your compost pile.
September
September marks the transition from summer to fall. Continue harvesting summer crops but begin clearing spent plants as they finish. Direct-sow spinach and lettuce under row covers for extended fall harvest. Plant cover crops in empty beds to protect and improve the soil over winter. In zones 7 and warmer, begin planting cool-season crops for winter harvest. This is a great time to test your soil and apply amendments before winter.
October
October is garlic planting month. Separate garlic bulbs into individual cloves and plant them two inches deep, pointed end up, six inches apart. The cloves will root in fall and send up shoots in early spring for a mid-summer harvest. Continue harvesting fall crops like kale, Brussels sprouts, and carrots, which actually improve in flavor after a light frost. Protect tender crops with row covers or cold frames to extend the season. Harvest winter squash before a hard freeze and cure it in a warm, dry spot for two weeks before storing.
November
November is cleanup and preparation month. Remove spent plant material from the garden and add it to the compost pile. Apply a thick layer of mulch or shredded leaves to protect perennial crops, overwintering garlic, and empty beds. Clean and store tools, cages, and trellises. Reflect on the season: what varieties performed well, what you would change, and what new crops you want to try next year. If you want to keep harvesting, install a cold frame or low tunnel over your spinach and lettuce beds for winter production.
December
December is rest and planning month. Review seed catalogs that begin arriving, plan next year's garden layout, and order seeds early for the best selection. If you have a cold frame or indoor growing setup, you can still harvest fresh greens. Use the quiet time to repair raised beds, build new structures, and organize your gardening supplies. Start dreaming about next year's garden while enjoying the fruits of your preservation efforts from the growing season.
Planting Calendar
This calendar summarizes the key activities for each month. Adjust by two to three weeks based on your specific zone and frost dates.
| Month | Indoor Starts | Direct Sow / Transplant | Harvest |
|---|---|---|---|
| January | Onions, leeks | Planning and ordering seeds | Stored root crops, preserved goods |
| February | Broccoli, cauliflower, cabbage, lettuce | None outdoors | Cold frame greens |
| March | Tomatoes, peppers, eggplant | Peas, spinach, radishes, carrots, onion sets | Overwintered greens, spinach |
| April | Cucumbers, squash, melons | Transplant brassicas; direct-sow beets, turnips | Radishes, spinach, lettuce, peas |
| May | Start fall crops late month | Transplant tomatoes, peppers; direct-sow beans, corn | Lettuce, radishes, asparagus, peas |
| June | Fall broccoli, cauliflower | Succession beans, lettuce; sweet potatoes | Peas, lettuce, early beans, strawberries |
| July | Fall brassicas | Fall carrots, beets, turnips, rutabagas | Tomatoes, peppers, cucumbers, beans, squash |
| August | None | Fall lettuce, spinach, arugula, radishes | Peak summer harvest: tomatoes, corn, melons |
| September | None | Spinach under covers; cover crops | Summer crops, fall greens, winter squash |
| October | None | Garlic | Brussels sprouts, kale, carrots, beets, squash |
| November | None | None (cleanup month) | Kale, Brussels sprouts, root crops |
| December | None | None (planning month) | Stored crops, cold frame greens |
Succession Planting
Succession planting is one of the most powerful techniques for maximizing your garden's productivity. Instead of planting an entire row of lettuce at once and then having fifty heads ready at the same time, you plant a small section every two to three weeks. This ensures a continuous, manageable harvest over the entire season rather than one overwhelming glut followed by nothing.
Fast-maturing crops are the best candidates for succession planting. Lettuce, radishes, bush beans, spinach, arugula, and beets all mature in thirty to sixty days and can be sown repeatedly from early spring through late summer. Some gardeners keep a simple log or spreadsheet that tracks when each section was planted and when it should be ready for harvest. Over time, you develop a rhythm that keeps your kitchen supplied with fresh produce week after week.
Succession planting also helps with pest management. When plants of the same age are concentrated together, pests can build up quickly. By having plants at different stages of growth spread across the garden, you make it harder for pest populations to reach damaging levels. This approach works hand in hand with the natural pest control methods that we recommend for all gardens.
A practical succession schedule for a typical zone 6 garden might look like this: plant the first round of lettuce and radishes in mid-March, the second in early April, the third in late April, the fourth in mid-May, the fifth in early June, and so on. After each harvest, amend the soil with a thin layer of compost and replant immediately. This cycle keeps the garden productive and the soil active from early spring until hard frost.
Cover Crops
Cover crops, also called green manures, are plants grown specifically to improve the soil rather than for harvest. They are one of the most underutilized tools in home garden planning. Cover crops protect bare soil from erosion, suppress weeds, add organic matter, fix nitrogen, and break up compacted soil. They are planted in empty beds during fallow periods, usually in late summer or fall, and are turned into the soil before planting the following season.
Common Cover Crops
Crimson clover and hairy vetch are legumes that fix atmospheric nitrogen in their root nodules, providing free fertilizer for the following crop. Winter rye is a hardy grass that produces massive root systems that break up compacted soil and add large amounts of organic matter. Buckwheat is a fast-growing summer cover crop that smothers weeds and attracts pollinators with its white flowers. Oats are easy to establish and winter-kill in cold climates, leaving a mulch of dead stems that protects the soil through winter.
How to Use Cover Crops
Sow cover crop seeds in empty beds after harvesting the main crop, typically from late August through September. Broadcast seeds at the recommended rate, rake them into the soil surface, and water well. Let the cover crop grow until it reaches maturity or until you are ready to plant the bed in spring. At that point, cut the cover crop at the soil surface and either compost the tops or leave them as mulch. Turn the roots into the soil and wait two to three weeks before planting to allow the green material to decompose and prevent nitrogen tie-up. If you are also vermicomposting, cover crop residues make excellent worm food when composted.
Planning Tools and Resources
Good planning tools make seasonal garden planning easier and more accurate. Here are some resources that experienced gardeners rely on.
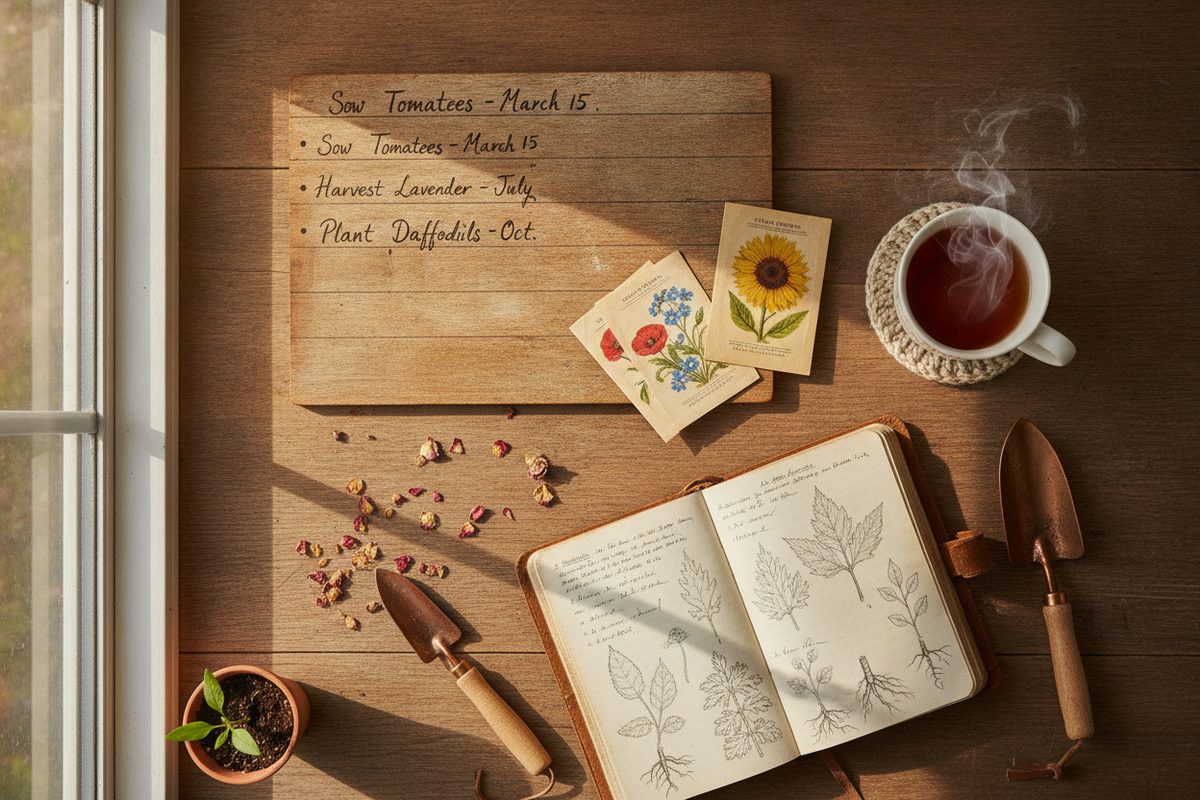
Garden Journal
A simple garden journal is the single most valuable planning tool you can have. Record planting dates, varieties, weather conditions, pest observations, harvest dates, and yield quantities. Over a few seasons, this record becomes an invaluable personalized guide for your specific garden. Note which tomato varieties performed best, when your first and last frost dates actually occurred, and which planting schedules worked and which did not. A physical notebook works fine, but digital garden journal apps offer search functionality and photo storage that many gardeners find helpful.
Frost Date Calculators
Online frost date calculators provide your average last spring frost and first fall frost dates based on your zip code. These dates are the backbone of your planting schedule. The Old Farmer's Almanac and the National Gardening Association both offer reliable frost date calculators. Remember that these dates are averages, and you should be prepared to protect plants if a late frost threatens seedlings that have already been transplanted.
Seed Starting Calculators
Once you know your frost date, seed starting calculators tell you exactly when to start each crop indoors. Enter your frost date, select the crop, and the calculator provides the recommended start date. Some calculators also account for your specific zone and provide a customized planting schedule for the entire year. This removes the guesswork and ensures you are starting seeds at the optimal time for strong, healthy transplants.
Companion Planting Charts
Companion planting is the practice of growing certain plants together for mutual benefit. Some combinations deter pests, others improve pollination, and some simply grow well together because they have complementary root depths or growth habits. A companion planting chart helps you design beds where every plant supports its neighbors. Pair this knowledge with our pollinator-friendly garden guide for a garden that practically manages itself.
Frequently Asked Questions
How do I find my frost dates?
You can find your average frost dates through your local agricultural extension service website, the Old Farmer's Almanac online tool, or the National Gardening Association frost date calculator. Simply enter your zip code and the tool provides your average last spring frost and first fall frost dates. Keep in mind that these are averages based on historical data, and actual frost dates vary from year to year. Always be prepared to protect tender plants if frost threatens earlier or later than expected.
Can I grow vegetables year-round?
In zones 7 and warmer, you can grow cool-season crops through the winter with minimal protection like row covers or cold frames. In colder zones, you can extend the season significantly using cold frames, low tunnels, and indoor growing setups. Kale, spinach, and mache (corn salad) are especially cold-hardy and can survive temperatures well below freezing with protection. With planning, most gardeners can harvest fresh greens at least ten months of the year, even in northern climates.
What is the easiest vegetable for a beginner to grow?
Radishes are the easiest vegetable to grow. They germinate in three to five days, mature in twenty-five to thirty days, tolerate poor soil and cool temperatures, and are rarely bothered by pests or diseases. Lettuce, bush beans, and zucchini are also excellent beginner crops that produce reliably with minimal care. For a complete beginner's perspective, read our guide on starting a vegetable garden from scratch.
How do I know when to start seeds indoors?
Count backward from your last frost date. Most warm-season crops should be started six to eight weeks before the last frost. Cool-season brassicas (broccoli, cauliflower, cabbage) should be started six to eight weeks before you plan to transplant them outdoors, which is typically four to six weeks before the last frost. Check the seed packet for specific timing, and use a seed starting calculator for precision. Starting too early produces leggy, overgrown transplants. Starting too late delays your harvest.
How many times can I succession plant in a season?
It depends on the crop and your growing season length. Fast crops like radishes (thirty days) and lettuce (forty-five days) can be succession-planted every two to three weeks from early spring through late summer, giving you six to eight plantings per year. Bush beans (fifty days) can be planted three to four times. Slower crops like carrots (seventy days) and beets (fifty-five days) can be planted two to three times. The key is to sow the next planting just as the previous one reaches maturity so there is no gap in your harvest.
Should I rotate crops every year?
Yes, crop rotation is highly recommended. Growing the same crop in the same spot year after year depletes specific nutrients and allows soil-borne pests and diseases to build up. A simple three or four-year rotation is sufficient for a home garden: move each crop family to a different bed each year. Group crops by family: nightshades (tomatoes, peppers, eggplant), cucurbits (squash, cucumbers, melons), legumes (beans, peas), and brassicas (broccoli, cabbage, kale). The legume group fixes nitrogen, so planting beans where heavy-feeding brassicas grew the previous year takes advantage of the residual nitrogen. If you are building raised beds, our raised bed guide includes layout plans that facilitate easy rotation.