Every great garden starts beneath the surface. Before you plant a single seed, the health and composition of your soil will largely determine whether your plants thrive or struggle. Soil is not just dirt. It is a complex, living ecosystem teeming with billions of microorganisms, fungi, insects, and organic matter that work together to break down nutrients, retain moisture, and support root growth. Understanding what is in your soil and what it needs is the single most important step you can take toward a productive, healthy garden.
Yet many gardeners skip soil testing entirely, relying instead on guesswork or generic fertilizer recommendations. This approach often leads to wasted money on unnecessary amendments, nutrient imbalances that harm plants, and frustration when crops fail to perform. A simple soil test, which costs very little, can reveal exactly what your soil needs and save you from costly mistakes.
In this comprehensive guide, we will walk through everything you need to know about soil testing and amendment. You will learn why testing matters, how to collect samples correctly, how to interpret the results, and how to amend your soil for specific problems. We will cover pH adjustment, nutrient management, organic matter building, and long-term strategies for maintaining soil that produces abundant, healthy harvests year after year.
Why You Should Test Your Soil
Soil testing is the foundation of informed gardening. Without a test, you are essentially flying blind, guessing at what your soil might need based on how your plants look or what a general fertilizer bag recommends. The problem with this approach is that nutrient deficiencies and toxicities can produce similar symptoms, and applying the wrong amendment can make problems worse rather than better.
A soil test provides objective, measurable data about your soil's chemical composition. It tells you the current pH level, which determines how available nutrients are to plant roots. It measures the levels of essential nutrients like nitrogen, phosphorus, potassium, calcium, magnesium, and sulfur. It may also reveal the presence of micronutrients like iron, manganese, zinc, copper, and boron. Some tests even measure organic matter content and soil texture, which are critical indicators of soil health.
Knowing your soil's pH is particularly important because it affects everything else. Soil pH controls the solubility and availability of nutrients. Even if your soil contains abundant nitrogen, phosphorus, and potassium, plants cannot access these nutrients if the pH is too high or too low. For most vegetables, the ideal pH range is between 6.0 and 7.0. Outside this range, certain nutrients become locked up in chemical forms that plant roots cannot absorb.
Soil testing also helps you avoid over-application of nutrients, which is a common and costly mistake. Excessive nitrogen, for example, can produce lush foliage at the expense of fruit production, attract aphids and other pests, and leach into groundwater. Too much phosphorus can interfere with the uptake of micronutrients like iron and zinc. By testing first and amending only what is needed, you save money and protect the environment.
For new gardens, soil testing is especially critical. Urban and suburban soils may contain contaminants like lead, arsenic, or petroleum products from previous land use. A comprehensive soil test can alert you to these hazards before you grow food in potentially toxic soil. If contaminants are present, you can take steps to remediate the soil or use raised beds with imported soil.
When and How Often to Test
The best time to test your garden soil is in early spring, before you begin planting, or in late fall after you have finished harvesting. Testing in spring gives you time to amend the soil before planting, while fall testing allows amendments like lime or sulfur to work over the winter months when they have more time to integrate into the soil.
For established gardens, testing every two to three years is usually sufficient. This frequency allows you to track trends in soil health and make adjustments as needed. However, certain situations call for more frequent testing. If you are starting a brand-new garden, test before your first season and again after one year to see how the soil has responded to initial amendments and cultivation.
Test annually if you are experiencing persistent plant health problems such as yellowing leaves, poor fruit set, stunted growth, or blossom end rot. These symptoms often point to nutrient deficiencies or pH imbalances that a soil test can quickly identify. Testing is also wise after major soil disturbances, such as construction, flooding, or the removal of large amounts of plant material.
If you use your garden intensively, growing heavy feeders like tomatoes, corn, or squash year after year in the same beds, annual testing helps you stay on top of nutrient depletion. These crops pull large amounts of nitrogen, phosphorus, and potassium from the soil, and without replenishment, yields will decline over time.
How to Collect Soil Samples Properly
The accuracy of your soil test depends entirely on the quality of the sample you submit. A poorly collected sample can give misleading results, so it is worth taking the time to do this step correctly. The goal is to obtain a representative composite sample that reflects the average conditions across your garden area.
Start by identifying the areas you want to test. If your garden has distinct zones with different soil types, drainage patterns, or plant histories, test each zone separately. For example, a vegetable garden, a flower bed, and a lawn area should each have their own sample. Within each zone, collect subsamples from eight to twelve different spots.
Use a clean trowel, soil probe, or auger to collect each subsample. Push the tool to a depth of six to eight inches for garden beds or three to four inches for lawns. Pull out a thin vertical slice of soil and place it in a clean plastic bucket. Avoid touching the soil with your bare hands, as oils and residues from your skin can contaminate the sample. Do not use a rusty tool or a galvanized bucket, as these can skew results for certain micronutrients.
Remove any surface debris, mulch, or plant material from the top of each subsample before placing it in the bucket. Mix all the subsamples together thoroughly in the bucket, breaking up any clumps. From this mixture, take approximately one to two cups of soil and place it in a clean plastic bag or the container provided by your testing laboratory. Label the container clearly with the date, location, and any relevant notes about the area sampled.
Allow the soil to air dry at room temperature for twenty-four to forty-eight hours before mailing it to the laboratory, unless the lab instructions specify otherwise. Do not oven-dry or microwave the sample, as this can alter the chemical composition. If you are using a home test kit, follow the manufacturer's instructions carefully for the most accurate results.
DIY Testing vs. Laboratory Testing
There are two main approaches to soil testing: do-it-yourself home tests and professional laboratory analysis. Each has its advantages and limitations, and the best approach often involves using both.
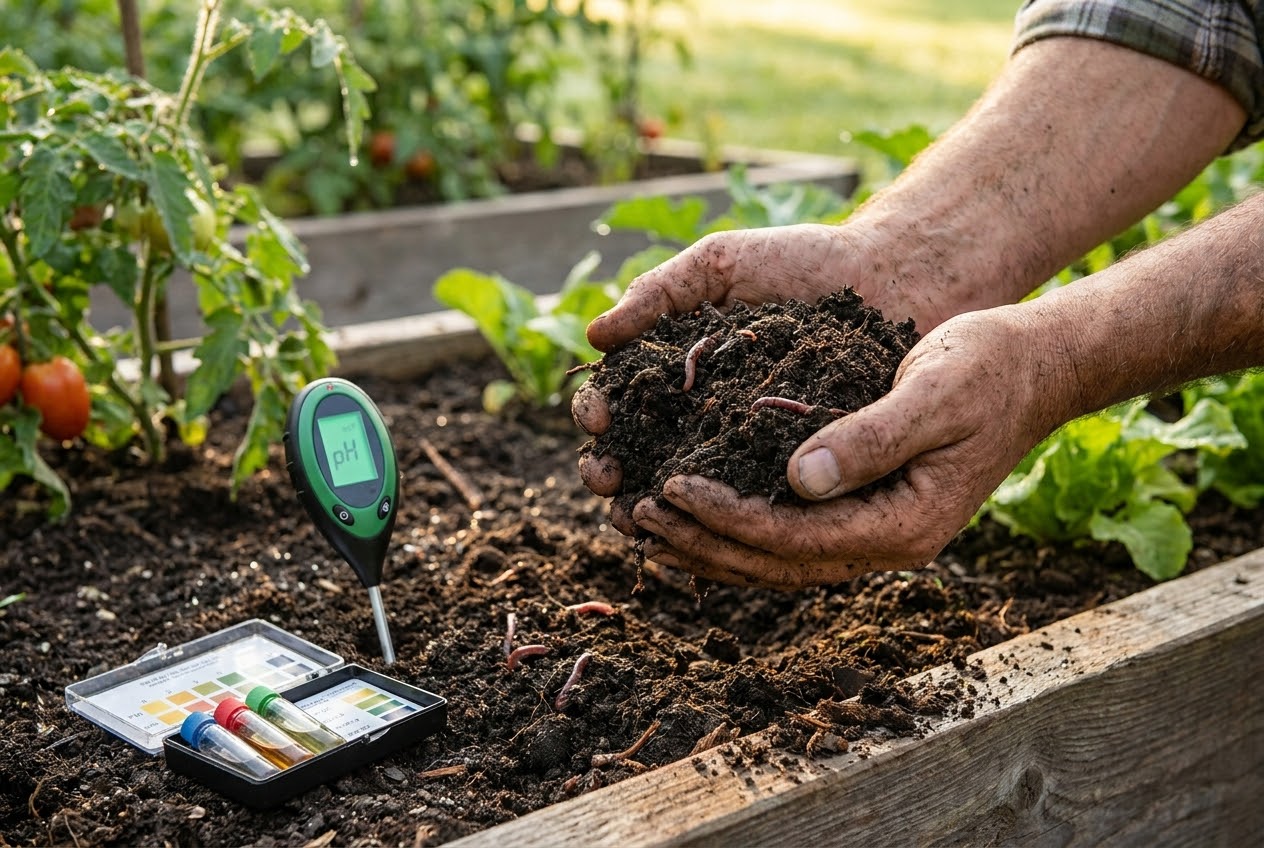
DIY home test kits are widely available at garden centers and online for a few dollars to around thirty dollars. These kits typically use color-coded chemical reactions to estimate soil pH and sometimes nitrogen, phosphorus, and potassium levels. Digital pH meters are also popular; you simply push the probe into moist soil and read the display. The main advantages of home testing are speed, convenience, and low cost. You can get results in minutes without waiting for a laboratory to process your sample.
However, home test kits have significant limitations. They are generally less accurate than laboratory tests, especially for pH readings, which can vary by half a point or more depending on soil moisture, temperature, and technique. Digital meters can be unreliable, particularly inexpensive models that lose calibration quickly. Home kits also do not typically measure micronutrients, organic matter content, soil texture, or potential contaminants.
Professional laboratory testing through your local cooperative extension service or a private soil lab provides far more detailed and accurate results. For a modest fee, usually between fifteen and thirty dollars per sample, you receive a comprehensive report that includes pH, macro and micronutrient levels, organic matter percentage, cation exchange capacity, and specific amendment recommendations tailored to the crops you plan to grow.
The cooperative extension service is an excellent starting point for most gardeners. Every state has an extension office affiliated with its land-grant university, and most offer soil testing services to the public. Search online for your state's extension soil testing service for instructions and submission forms. Private labs like A&L Laboratories, Logan Labs, and Ward Laboratories also offer home gardener packages with detailed reports.
For the most thorough approach, start with a professional lab test to establish a baseline, then use home kits for quick checks between lab tests. This combination gives you the detailed data you need for major amendment decisions and the convenience of quick monitoring throughout the season.
Understanding Your Soil Test Results
When your soil test results arrive, the report may seem intimidating at first glance. Most lab reports include a table of values, a graph showing nutrient levels relative to optimal ranges, and specific recommendations for amendments. Understanding what each number means will help you make informed decisions.
The report will typically list soil pH first, expressed as a number on a scale from 0 to 14. A pH of 7.0 is neutral, below 7.0 is acidic, and above 7.0 is alkaline. Most garden plants prefer a pH between 6.0 and 7.0. The report may also include a buffer pH, which indicates how resistant the soil is to pH change. A high buffer pH means the soil will require more amendment to shift its pH.
Nutrient levels are usually reported in parts per million or pounds per acre. Each nutrient will be rated as low, medium, optimum, or high. The ratings indicate whether the current level is sufficient for plant growth or whether additional input is needed. A rating of optimum means the nutrient is at an ideal level and no additional application is necessary. Low means the nutrient is deficient and should be added. High means there is an excess, and no more should be applied; in some cases, excess nutrients can be harmful.
Cation exchange capacity (CEC) measures the soil's ability to hold and release positively charged nutrients like calcium, magnesium, and potassium. Soils with higher CEC can retain more nutrients and are generally more fertile. Sandy soils typically have low CEC, while clay soils and soils rich in organic matter have high CEC. Understanding your CEC helps you gauge how quickly your soil will respond to amendments and how frequently you need to fertilize.
Some reports also include a base saturation percentage, which shows the proportion of the soil's cation exchange sites occupied by calcium, magnesium, and potassium. The ideal ratio is roughly 60 to 70 percent calcium, 10 to 15 percent magnesium, and 2 to 5 percent potassium. Imbalances in these ratios can affect soil structure and nutrient availability even when individual nutrient levels appear adequate.
Soil pH: The Master Variable
If there is one number you should pay the most attention to on your soil test, it is pH. Soil pH is often called the master variable because it influences virtually every chemical and biological process in the soil. It determines which nutrients are available to plants, affects microbial activity, influences the solubility of toxic elements like aluminum and manganese, and even impacts the effectiveness of pesticides and herbicides.
Soil pH is measured on a logarithmic scale, which means that a pH of 5.0 is ten times more acidic than a pH of 6.0 and one hundred times more acidic than a pH of 7.0. This logarithmic nature means that even small changes in pH represent significant shifts in soil chemistry. Moving from 5.5 to 6.5 can dramatically improve nutrient availability for most garden plants.
The pH scale runs from 0 to 14, with 7.0 being neutral. Most soils fall between 4.0 and 8.5. Highly acidic soils are common in regions with high rainfall, as water leaches basic minerals like calcium and magnesium from the soil over time. Alkaline soils are more common in arid regions where evaporation concentrates minerals at the surface. Your native soil pH is largely determined by the parent rock material and climate, but human activities like fertilization, irrigation, and the addition of organic matter can also influence it.
Different plants have different pH preferences. Blueberries, azaleas, and rhododendrons thrive in acidic soil with a pH of 4.5 to 5.5. Most vegetables perform best at 6.0 to 7.0. Asparagus and brassicas like broccoli and cauliflower can tolerate slightly alkaline conditions up to 7.5. Lavender and rosemary prefer neutral to slightly alkaline soil. Matching your plants to your soil pH, or adjusting the pH to match your plants, is one of the most effective things you can do for garden success.
Soil pH also affects the activity of beneficial microorganisms. Nitrogen-fixing bacteria, which convert atmospheric nitrogen into forms plants can use, function best in slightly acidic to neutral soil. Mycorrhizal fungi, which help plant roots absorb water and nutrients, are less active in very acidic or very alkaline conditions. By maintaining optimal pH, you support the entire soil food web.
Understanding NPK and Micronutrients
The three primary macronutrients, nitrogen, phosphorus, and potassium, are the ones most commonly discussed in gardening because plants need them in the largest quantities. Each plays a distinct role in plant health, and deficiencies in any one of them will visibly affect growth and productivity.
Nitrogen is the nutrient most responsible for vegetative growth. It is a key component of chlorophyll, the molecule that captures sunlight energy for photosynthesis. Plants with adequate nitrogen produce dark green leaves and vigorous stems. Nitrogen deficiency typically shows up as yellowing of older leaves first, because nitrogen is mobile within the plant and is moved from older tissues to support new growth. Too much nitrogen can cause excessive leafy growth at the expense of fruit and flower production, attract pest insects, and make plants more susceptible to disease.
Phosphorus is essential for root development, flowering, fruiting, and seed formation. It plays a critical role in energy transfer within the plant and is especially important during the early stages of growth and during flowering and fruiting. Phosphorus deficiency often appears as purplish discoloration of leaves and stems, delayed maturity, and poor fruit set. Unlike nitrogen, phosphorus does not move easily through the soil and tends to bind to soil particles, so surface applications may take time to reach root zones.
Potassium, sometimes called potash, regulates water movement within the plant, activates enzymes involved in photosynthesis and protein synthesis, and strengthens cell walls. Plants with adequate potassium are more drought-tolerant, disease-resistant, and produce higher-quality fruit. Potassium deficiency typically shows as browning or scorching of leaf margins, starting with older leaves.
Beyond the big three, plants also need secondary macronutrients including calcium, magnesium, and sulfur. Calcium strengthens cell walls and prevents disorders like blossom end rot in tomatoes. Magnesium is the central atom in the chlorophyll molecule and is essential for photosynthesis. Sulfur is a component of several amino acids and vitamins.
Micronutrients are needed in much smaller quantities but are equally essential. Iron is necessary for chlorophyll synthesis and is often deficient in alkaline soils. Manganese activates many enzymes and is involved in photosynthesis. Zinc plays a role in hormone production and growth regulation. Copper is involved in lignin synthesis and reproductive development. Boron is important for cell wall formation and sugar transport. Molybdenum is essential for nitrogen metabolism. Deficiencies in any of these can reduce plant health and productivity, even when macronutrients are abundant.
Organic Matter and Soil Health
Organic matter is the fraction of soil composed of decomposed plant and animal residues, living organisms, and the substances they produce. While it typically makes up only two to ten percent of soil by weight, its impact on soil health is enormous. Organic matter improves soil structure, increases water-holding capacity, enhances nutrient retention, feeds beneficial microorganisms, and buffers pH changes.
Soils rich in organic matter have a dark, crumbly texture that is easy to work with and provides an ideal environment for root growth. The decomposing organic material creates aggregates, or clumps, of soil particles with air spaces between them. These aggregates allow water to infiltrate rather than run off, roots to penetrate easily, and air to reach root zones and beneficial organisms.
Organic matter also acts as a slow-release nutrient reservoir. As microorganisms break down organic materials, they release nutrients in forms that plants can absorb. This process, called mineralization, provides a steady supply of nitrogen, phosphorus, sulfur, and micronutrients throughout the growing season. Soils with higher organic matter content need less supplemental fertilization because the natural nutrient cycling is more robust.
Most soil tests report organic matter as a percentage. A healthy garden soil should have at least three to five percent organic matter, with five to ten percent being ideal for vegetable production. If your test shows organic matter below three percent, building it up should be a top priority. The primary way to increase organic matter is by adding compost, which you can learn more about in our ultimate composting guide.
Other ways to build organic matter include using cover crops, applying mulch, incorporating leaf mold, adding well-rotted manure, and practicing no-till or reduced-till gardening. Each of these methods adds carbon-based materials to the soil that feed the microbial community and gradually improve soil structure and fertility. Building organic matter is a long-term project, but the benefits compound over time, creating soil that becomes more productive and resilient with each passing season.
Soil Amendment Guide
Once you have your soil test results, the next step is to select and apply the appropriate amendments. The following table provides a quick reference for common soil problems and the amendments that address them.
| Problem | Amendment | Application Rate | Best Timing |
|---|---|---|---|
| Low pH (too acidic) | Garden lime (calcium carbonate) | 5–10 lbs per 100 sq ft, depending on current pH and soil type | Fall or early spring, 2–3 months before planting |
| High pH (too alkaline) | Elemental sulfur | 1–2 lbs per 100 sq ft | Fall, for spring effect; repeat annually as needed |
| Low nitrogen | Blood meal, composted manure, fish emulsion | Blood meal: 2–3 lbs per 100 sq ft; manure: 20–30 lbs per 100 sq ft | Spring before planting; side-dress during growing season |
| Low phosphorus | Bone meal, rock phosphate | Bone meal: 5–10 lbs per 100 sq ft; rock phosphate: 10 lbs per 100 sq ft | Fall or spring; rock phosphate needs 1–2 seasons to become available |
| Low potassium | Greensand, kelp meal, wood ash | Greensand: 5–10 lbs per 100 sq ft; wood ash: 1–2 lbs per 100 sq ft | Fall for slow-release; spring for faster-acting sources |
| Low organic matter | Compost, leaf mold, aged manure | 2–4 inches worked into top 6–8 inches of soil | Fall or spring; fall is ideal for winter decomposition |
| Low calcium | Gypsum, calcitic lime, eggshells | Gypsum: 2–4 lbs per 100 sq ft | Fall or spring; gypsum does not affect pH |
| Low magnesium | Dolomitic lime, Epsom salt | Dolomitic lime: 5–10 lbs per 100 sq ft; Epsom salt: 1–2 tbsp per gallon water | Fall for lime; any time for foliar Epsom salt spray |
| Compacted soil | Gypsum, compost, coarse sand (for clay) | Gypsum: 2–4 lbs per 100 sq ft; compost: 2–3 inches on surface | Fall; follow with cover crop |
| Low iron | Chelated iron, iron sulfate | Chelated iron: per label instructions; iron sulfate: 1–2 oz per gallon water | Spring, applied as foliar spray or soil drench |
How to Adjust Soil pH
Adjusting soil pH is one of the most impactful amendments you can make, and it is also one that requires patience. Chemical reactions in the soil take time, and it may take several months to a full year to see the full effect of a pH adjustment.
To raise pH in acidic soil, apply agricultural lime, also known as garden lime or calcium carbonate. Lime works by neutralizing hydrogen ions in the soil, which reduces acidity. The amount you need depends on your current pH, your target pH, and your soil type. Sandy soils require less lime to shift pH than clay soils because clay has a higher buffering capacity. As a general guideline, sandy soils may need five pounds of lime per hundred square feet to raise pH by one point, while clay soils may need ten pounds or more.
Dolomitic lime contains both calcium carbonate and magnesium carbonate, making it a good choice when your soil test shows both low pH and low magnesium. Calcitic lime contains only calcium carbonate and is preferred when magnesium levels are already adequate. Apply lime in fall for best results, as winter freeze-thaw cycles help incorporate it into the soil. Till or work lime into the top six inches of soil for the fastest effect.
To lower pH in alkaline soil, apply elemental sulfur or aluminum sulfate. Elemental sulfur is the most common choice and works through a biological process: soil bacteria convert the sulfur to sulfuric acid, which lowers pH. This process is temperature-dependent and proceeds slowly in cool soil, so fall application is recommended for spring planting. Aluminum sulfate works faster because it reacts directly with soil chemistry, but it can release toxic levels of aluminum if over-applied, so use it cautiously.
The amount of sulfur needed depends on your current pH, target pH, and soil texture. Sandy soils require less sulfur than clay soils. A typical application rate is one to two pounds of elemental sulfur per hundred square feet, but always follow your soil test recommendations. Do not apply more than two pounds per hundred square feet at one time, as excessive sulfur can damage soil biology.
For raised beds and container gardens where you have more control over the growing medium, you can mix peat moss (which is naturally acidic) into the soil to help lower pH. However, peat harvesting has environmental concerns, so consider using homemade compost or coconut coir as alternatives when possible.
After applying pH amendments, retest your soil after three to six months to check progress. It may take multiple applications over one to two growing seasons to reach your target pH, especially if the adjustment is large. Be patient and avoid the temptation to over-apply amendments, as this can overshoot the target and create new problems.
Adding Nutrients Naturally
While synthetic fertilizers provide a quick nutrient boost, organic and natural nutrient sources offer additional benefits for soil health. They feed the soil biology, improve soil structure, and provide a slow, steady release of nutrients that matches plant uptake patterns. Here are the best natural sources for each major nutrient.
For nitrogen: Composted animal manure (especially chicken and rabbit manure), blood meal, feather meal, fish meal, and alfalfa meal are all excellent organic nitrogen sources. Cover crops like clover, vetch, and winter rye also add nitrogen through biological fixation and decomposition. Fish emulsion is a fast-acting liquid nitrogen source that can be applied as a foliar spray or soil drench during the growing season. For more on building nutrient-rich soil, see our guide on starting a vegetable garden from scratch.
For phosphorus: Bone meal is the most common organic phosphorus source and is readily available at garden centers. It releases phosphorus slowly over several months. Rock phosphate is another option, but it is very slow to become available and may take two to three years to significantly impact soil phosphorus levels. Bat guano, particularly phosphorus-rich varieties, provides a faster-acting organic phosphorus source. Compost also contributes modest amounts of phosphorus while improving overall soil biology.
For potassium: Greensand (glauconite) is a slow-release mineral source of potassium that also contains trace minerals. Kelp meal and liquid kelp extract provide potassium along with a broad spectrum of micronutrients and growth-promoting hormones. Wood ash from untreated hardwood contains five to seven percent potassium and also raises soil pH, so use it judiciously and monitor pH regularly. Sul-Po-Mag, also known as langbeinite, is a naturally mined mineral that provides potassium, magnesium, and sulfur without significantly affecting pH.
For micronutrients: Compost is the best all-around source of micronutrients because it contains trace amounts of virtually every mineral plants need. Kelp meal is exceptionally rich in micronutrients, particularly iron, manganese, zinc, and copper. Azomite is a volcanic rock dust that supplies a broad range of trace minerals. For specific deficiencies identified by your soil test, chelated micronutrient supplements are available and are designed to be quickly plant-available.
Building Long-Term Soil Health
Healthy soil is not built overnight. It is the result of consistent, thoughtful management over many seasons. The most sustainable approach to soil health focuses on feeding the soil ecosystem rather than simply feeding individual plants. When the soil biology is thriving, nutrient cycling is efficient, disease suppression is enhanced, and plants are more resilient to stress.
Add compost regularly. Apply a two to four inch layer of finished compost to your garden beds each year, either in spring before planting or in fall after harvest. Compost provides organic matter, nutrients, and beneficial microorganisms. Over time, regular compost applications will steadily increase organic matter content, improve soil structure, and reduce the need for additional fertilization. Our composting guide covers multiple methods for producing high-quality compost at home.
Use cover crops. Cover crops, also called green manures, are plants grown specifically to improve the soil rather than for harvest. Leguminous cover crops like crimson clover, hairy vetch, and field peas fix atmospheric nitrogen through a symbiotic relationship with root bacteria. Grass cover crops like winter rye and oats add organic matter and help prevent erosion. Buckwheat is a fast-growing summer cover crop that suppresses weeds and attracts pollinators. After cover crops flower or reach maturity, chop them down and incorporate them into the soil or leave them as a mulch layer.
Minimize tillage. Excessive tillage disrupts soil structure, destroys fungal networks, kills earthworms and other beneficial organisms, and accelerates the decomposition of organic matter. Consider adopting no-till or reduced-till practices in your garden. Instead of tilling, layer compost and mulch on the surface and let earthworms and microorganisms incorporate them naturally. If you must till, do so sparingly and shallowly, and always follow with a cover crop or mulch to protect the exposed soil.
Mulch consistently. A layer of organic mulch, such as straw, wood chips, shredded leaves, or grass clippings, protects the soil surface from erosion, moderates soil temperature, retains moisture, suppresses weeds, and gradually decomposes to add organic matter. Apply two to four inches of mulch around established plants, keeping it a few inches away from stems to prevent rot. Refresh mulch as it breaks down throughout the season.
Diversify your plantings. Monoculture, growing the same crop in the same spot year after year, depletes specific nutrients and encourages soil-borne diseases and pests. Practice crop rotation by moving plant families to different beds each year. For example, follow heavy-feeding tomatoes with nitrogen-fixing beans, then leafy greens, then root vegetables. This rotation balances nutrient use and breaks pest and disease cycles.
Encourage soil life. Earthworms, beneficial fungi, bacteria, and other soil organisms are the engines that drive nutrient cycling and soil health. Feed them with diverse organic materials, avoid chemicals that harm them, and provide habitat by minimizing soil disturbance. A single handful of healthy garden soil contains more microorganisms than there are people on Earth. When you nurture this invisible workforce, your garden will repay you with healthier plants and bigger harvests.
Test and adjust annually. Make soil testing a regular part of your gardening routine. Each year, take note of how your plants respond to amendments and adjust your approach accordingly. Keep records of what you apply and the test results you receive. Over time, you will develop a deep understanding of your soil's unique character and needs, and you will be able to fine-tune your management practices for optimal results.
Building long-term soil health is a journey, not a destination. Every bag of compost you spread, every cover crop you sow, and every test you take brings you one step closer to soil that is rich, fertile, and teeming with life. The payoff is a garden that practically tends itself, producing abundant harvests with fewer inputs and less effort year after year.
Frequently Asked Questions
How often should I test my garden soil?
Test your garden soil at least once every two to three years. If you are starting a new garden, have recently added significant amendments, or are experiencing plant health problems, test annually until the soil stabilizes. The best time to test is in early spring before planting or in fall after harvest. Keep records of each test so you can track changes over time and adjust your amendment strategy accordingly.
What is the ideal soil pH for most vegetables?
Most vegetables thrive in slightly acidic to neutral soil with a pH between 6.0 and 7.0. Some plants have specific preferences: blueberries prefer more acidic soil around 4.5 to 5.5, while asparagus and brassicas tolerate slightly alkaline conditions up to 7.5. Testing your soil pH is the first step, and you can adjust it with lime to raise pH or sulfur to lower it. Always make adjustments based on soil test recommendations rather than guessing.
Can I test my soil at home, or do I need a lab?
Both home testing and lab testing have their place. Home test kits and digital meters can give you a quick, affordable reading of soil pH and sometimes basic nutrient levels. However, lab testing from your local cooperative extension service provides far more detailed and accurate results, including micronutrient levels, organic matter percentage, and specific amendment recommendations. For the most comprehensive picture, start with a lab test and use home kits for monitoring between lab tests.
What do NPK numbers mean on soil test results?
NPK stands for Nitrogen, Phosphorus, and Potassium, the three primary macronutrients plants need. On soil test results, these are typically reported in parts per million or pounds per acre. Nitrogen promotes leafy green growth, phosphorus supports root development and flowering, and potassium aids overall plant health, disease resistance, and water regulation. Your soil test will indicate whether each nutrient is low, medium, optimal, or high, along with specific application recommendations.
How long does it take for soil amendments to work?
The timeline varies by amendment type. Fast-acting amendments like chelated iron or liquid fertilizers can show results within days to weeks. Moderate amendments like lime, sulfur, and most organic fertilizers typically take one to three months to show measurable effects. Long-term amendments like compost, bone meal, and rock phosphate may take a full growing season or longer to fully integrate into the soil. Consistent annual amendment applications build soil health progressively over multiple seasons.
Your soil is the living foundation beneath everything you grow. By investing a small amount of time and money in testing, and applying amendments thoughtfully based on actual data, you set the stage for a garden that produces abundantly, resists disease, and improves year after year. Do not guess when you can test. Do not hope when you can know. Your soil will tell you exactly what it needs, if you just ask.