Why Grow Mushrooms at Home
Mushrooms are one of the most fascinating and rewarding things you can grow at home. Unlike traditional garden plants, mushrooms do not need sunlight, fertile soil, or even a garden bed. They thrive in dark, humid environments and can be cultivated in a closet, basement, garage, or even on your kitchen counter. The entire process from inoculation to harvest can take as little as two to three weeks with some varieties, making mushrooms one of the fastest food crops you can produce at home.
The cost savings alone make home mushroom growing worthwhile. Specialty mushrooms like lion's mane, shiitake, and oyster sell for twelve to twenty dollars per pound at grocery stores and farmers markets. A single mushroom growing kit that costs fifteen to thirty dollars can produce multiple flushes totaling one to three pounds of fresh mushrooms. When you learn to make your own spawn and substrates, the cost per pound drops to nearly nothing. It is one of the highest return-on-investment food growing activities you can undertake.
Beyond the economics, growing mushrooms is genuinely fun. Watching tiny pins emerge from a substrate and develop into full-sized fruiting bodies over just a few days is a magical experience that never gets old. Mushrooms grow so fast that you can observe meaningful changes in just a few hours, which makes them especially rewarding for children and impatient adults alike. There is also a deep satisfaction in eating something you cultivated from spore to plate, especially when that something is as delicious as a freshly harvested oyster mushroom sauteed in butter.
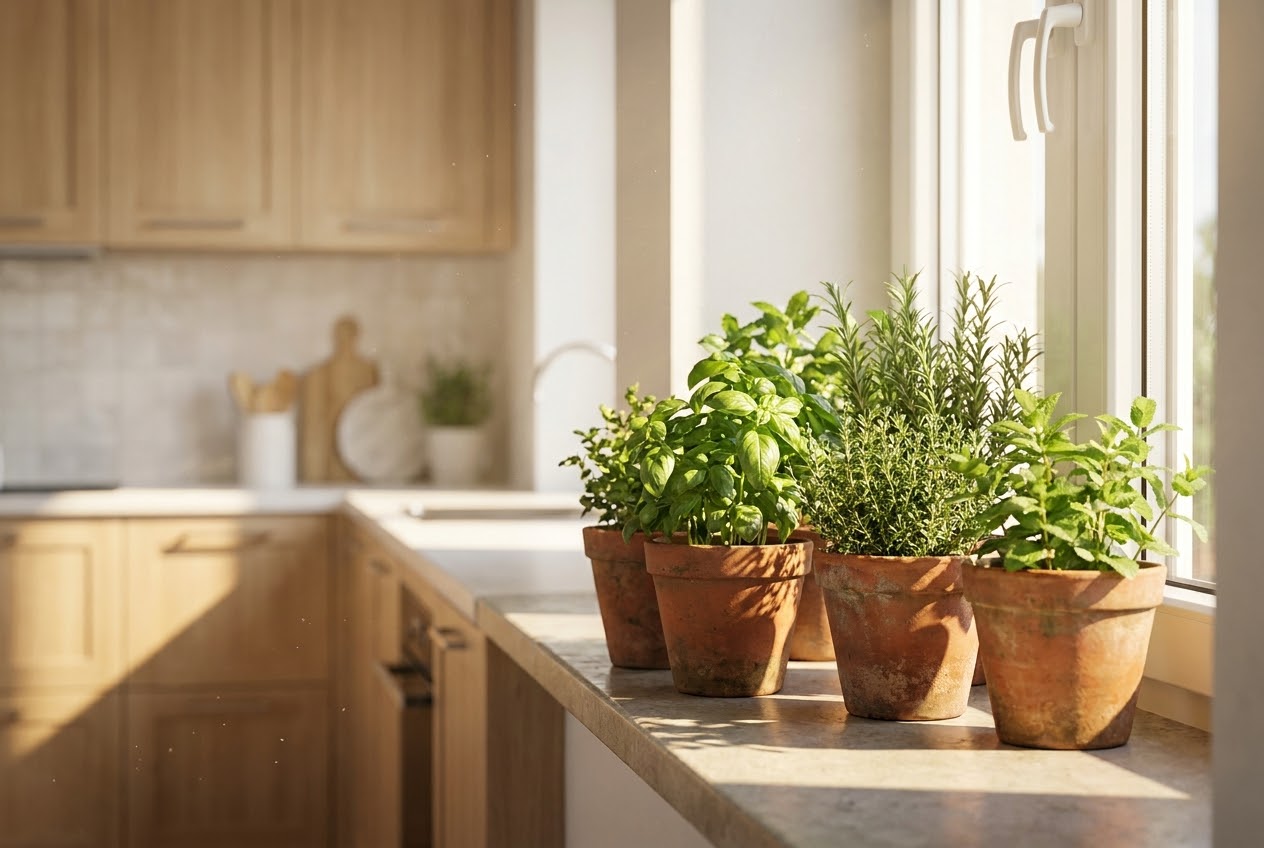
If you are already growing vegetables and herbs at home, mushrooms add a completely different dimension to your food production. They occupy spaces that plants cannot use, require no direct light, and produce food year-round regardless of outdoor weather. Our guide on growing herbs indoors pairs perfectly with mushroom growing for a complete indoor food production setup. You can even integrate mushroom cultivation into your outdoor garden through log cultivation or companion planting strategies.
Best Mushroom Varieties for Beginners
With thousands of mushroom species in the world, choosing where to start can feel overwhelming. Fortunately, a handful of varieties are both exceptionally easy to grow and wonderfully delicious to eat. These are the species that virtually every successful mushroom grower started with.
Oyster Mushrooms (Pleurotus ostreatus)
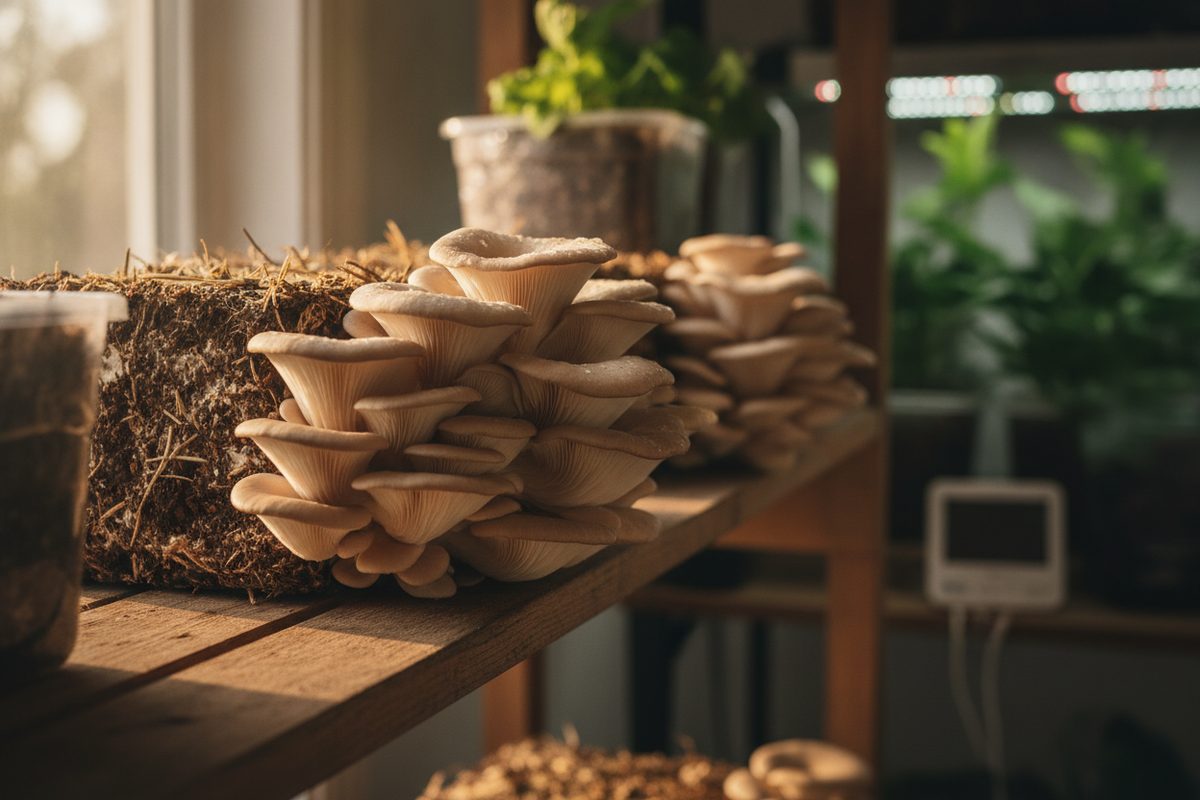
Oyster mushrooms are universally recommended as the best beginner mushroom, and for good reason. They are incredibly forgiving, grow on a wide range of substrates, fruit prolifically, and are resistant to many of the contamination issues that plague more finicky species. Oyster mushrooms come in several colors, including grey, blue, pink, golden, and king oyster, each with slightly different flavors and growing preferences.
Grey oyster mushrooms are the most tolerant of imperfect conditions and will fruit on almost anything organic, including straw, cardboard, coffee grounds, sawdust, and even old books. They prefer cooler temperatures for fruiting, typically between 55 and 65 degrees Fahrenheit, which makes them ideal for basements and garages in temperate climates. Pink oysters are faster and prefer warmer temperatures but are more delicate and have a shorter shelf life. Golden oysters produce beautiful clusters of bright yellow mushrooms with a nutty, peppery flavor that is absolutely delicious when sauteed. King oysters are different from the others in that they grow as individual thick-stemmed mushrooms rather than clusters, and their dense, meaty texture makes them a favorite among chefs and vegetarians.
Shiitake Mushrooms (Lentinula edodes)
Shiitake mushrooms are the second most popular mushroom in the world and one of the easiest to grow at home. They have a rich, smoky, umami flavor that intensifies when dried, making them a pantry staple in many cuisines. Shiitakes are traditionally grown on hardwood logs, which is a low-maintenance method that produces mushrooms for three to five years from a single log. They can also be grown on supplemented sawdust blocks indoors for faster results.
Shiitakes are slightly more demanding than oyster mushrooms in that they require hardwood-based substrates and are pickier about temperature and humidity. However, they are still quite manageable for beginners, especially with log cultivation, which requires almost no ongoing maintenance. After inoculating logs with shiitake spawn, you simply wait six to twelve months for the mycelium to colonize the log, then soak the log in cold water to trigger fruiting. The mushrooms emerge over the next week and can be harvested when the caps are open but still slightly curled under at the edges.
Lion's Mane Mushrooms (Hericium erinaceus)
Lion's mane is a showstopper. This unique mushroom grows in a cascading globe of white, icicle-like spines that look like something from an underwater coral reef. Beyond its stunning appearance, lion's mane has a mild, sweet flavor often compared to lobster or crab meat, and it has attracted significant scientific attention for its potential cognitive health benefits. Studies suggest that compounds in lion's mane may support nerve growth factor production and improve memory and focus.
Lion's mane grows well on supplemented hardwood sawdust and prefers slightly cooler temperatures, around 55 to 65 degrees Fahrenheit. It is slower to colonize than oyster mushrooms and requires more precise humidity during fruiting, but it is still well within the capabilities of a patient beginner. The key to successful lion's mane cultivation is maintaining high humidity and providing fresh air exchange, which prevents the spines from becoming elongated and coral-like rather than forming a tight, compact ball. When the spines are well-developed and the mushroom begins to yellow slightly at the edges, it is ready to harvest.
Mushroom Varieties Comparison
Use this table to compare popular mushroom varieties and decide which ones to start growing at home.
| Mushroom Type | Difficulty | Best Substrate | Time to Harvest | Flavor Profile |
|---|---|---|---|---|
| Grey Oyster | Beginner | Straw, coffee grounds, cardboard | 10–14 days after pinning | Mild, slightly anise |
| Pink Oyster | Beginner | Straw, pasteurized hay | 7–10 days after pinning | Nutty, bacon-like when cooked |
| Golden Oyster | Beginner | Straw, hardwood sawdust | 10–14 days after pinning | Nutty, peppery, delicate |
| King Oyster | Intermediate | Supplemented hardwood sawdust | 14–21 days after pinning | Savory, meaty, umami |
| Shiitake | Beginner–Intermediate | Hardwood logs, sawdust blocks | 5–14 days (logs: 6–12 months) | Rich, smoky, umami |
| Lion's Mane | Intermediate | Supplemented hardwood sawdust | 14–21 days after pinning | Sweet, lobster-like |
| Reishi | Beginner | Hardwood logs, sawdust, grain | Slow; 3–6 months | Bitter; used for teas and tinctures |
| Wine Cap | Beginner | Wood chips, straw, garden beds | 3–6 months outdoors | Earthy, potato-like, mild |
Growing Methods
There are several approaches to growing mushrooms at home, ranging from simple ready-made kits to fully DIY systems. Each method has its own advantages depending on your budget, available space, and how deep you want to dive into the hobby.
Ready-Made Growing Kits
If you want to grow mushrooms with zero experience and minimal effort, a pre-colonized growing kit is the way to go. These kits arrive as a fully colonized block of substrate inside a bag or box. All you need to do is cut open the bag, mist the block with water a couple of times a day, and wait for mushrooms to appear. Within one to two weeks, you will have fresh mushrooms ready to harvest. Most kits produce two to three flushes over several weeks before they are exhausted.
Kits are available for oyster mushrooms, shiitake, lion's mane, and several other species. They typically cost fifteen to thirty-five dollars and produce one to three pounds of mushrooms total. While the per-pound cost is higher than buying mushrooms at the store, the experience and the freshness make kits worthwhile, especially as a first step to learn the basics before investing in more advanced equipment.
Log Cultivation
Log cultivation is one of the oldest and most reliable methods for growing shiitake and other wood-loving mushrooms. Freshly cut hardwood logs, typically oak, maple, or beech, are inoculated with mushroom spawn plugs that are drilled into holes in the log. The logs are then stacked in a shady spot outdoors and left to colonize for six to twelve months. Once colonized, the logs produce mushrooms for three to five years with minimal maintenance.
The main advantage of log cultivation is its longevity and low maintenance. Once the logs are set up, you only need to soak them occasionally to trigger fruiting. The main drawback is patience: you will not see your first mushrooms for at least six months. Log cultivation is best for people who have outdoor space and are willing to play the long game. If you also enjoy growing fruit trees in small spaces, log mushroom cultivation can be integrated under existing trees in a shaded part of your yard.
Monotub Method
The monotub is the workhorse of indoor mushroom growing, especially for species that grow well on a substrate of grain and manure or coco coir. A monotub is essentially a large plastic storage tote with holes drilled in the sides for air exchange, lined with a plastic bag or filled with colonized substrate. It creates a self-regulating micro-environment with passive airflow and humidity, making it a low-maintenance option for indoor growing.
To build a monotub, drill two-inch holes on the long sides of a large plastic tote, stuff them with polyfill ( polyester stuffing) for air filtration, and fill the bottom with a mixture of colonized grain spawn and pasteurized substrate. Cover the holes with tape during colonization to retain moisture, then remove the tape and replace with polyfill when you introduce fruiting conditions. Monotubs are most commonly used for species that fruit well in enclosed environments, and they are a popular choice for oyster mushrooms and other aggressive colonizers.
Coffee Grounds Method
Used coffee grounds are a surprisingly effective substrate for oyster mushrooms, and they are available for free from any coffee shop. The grounds are already pasteurized by the brewing process, which reduces the risk of contamination. Simply collect used coffee grounds, mix them with oyster mushroom spawn in a clean container or bag, and place the container in a dark, warm spot. Within two to three weeks, the mycelium will have colonized the grounds, and you can open the container and begin misting for fruiting.
This method is perfect for apartment dwellers who want to start growing mushrooms with minimal equipment. A large mason jar or a five-gallon bucket works well as a container. The main risk with coffee grounds is contamination, since the moist grounds can attract mold. To reduce this risk, use fresh grounds (within twenty-four hours of brewing), mix in the spawn quickly in a clean environment, and avoid opening the container during colonization. Once the white mycelium has thoroughly colonized the grounds, contamination risk drops significantly.
Substrate Preparation
The substrate is the material that mushrooms grow on. Different mushroom species prefer different substrates, but the underlying principle is the same: you need to prepare the substrate to give your mushroom mycelium a competitive advantage over molds and bacteria.
Pasteurization vs. Sterilization
Substrate preparation falls into two categories: pasteurization and sterilization. Pasteurization involves heating the substrate to 160 to 180 degrees Fahrenheit for one to two hours, which kills most harmful organisms but leaves some beneficial thermophilic bacteria that actually help the mushroom mycelium establish itself. Pasteurization is the preferred method for straw and other bulk substrates used with oyster mushrooms and other aggressive species.
Sterilization involves heating the substrate to 250 degrees Fahrenheit (121 degrees Celsius) under pressure for ninety minutes to two hours, typically using a pressure cooker or autoclave. Sterilization kills everything, including beneficial organisms, and is necessary for supplemented substrates like hardwood sawdust mixed with grain or bran. The sterilized substrate is then inoculated in a clean environment to prevent contamination. Sterilization is required for lion's mane, king oyster, and shiitake grown on sawdust blocks.
Preparing Straw
Straw is the most popular bulk substrate for oyster mushrooms. To prepare it, chop the straw into two to four inch pieces using a weed trimmer inside a large trash can or garden shears. Chopping increases the surface area for the mycelium to colonize. Then pasteurize the straw by submerging it in hot water (160 to 180 degrees Fahrenheit) for one to two hours. A large stockpot on a propane burner works well for this. After pasteurization, drain the straw thoroughly and let it cool to room temperature before mixing with spawn. The straw should feel damp but not dripping when you squeeze a handful.
Preparing Hardwood Sawdust
For shiitake and lion's mane, supplemented hardwood sawdust is the standard substrate. Mix hardwood fuel pellets or sawdust with wheat bran or oat bran at a ratio of about five parts sawdust to one part bran by volume. Add water until the mixture reaches the right moisture content (when squeezed, a few drops of water should emerge). Load the mixture into autoclavable bags or jars and sterilize at fifteen PSI for ninety minutes. Once cooled, the substrate is ready for inoculation with spawn in a clean environment.
Inoculation and Colonization
Inoculation is the process of introducing mushroom spawn to your prepared substrate. Spawn is simply a material colonized with mushroom mycelium. The most common types are grain spawn (rye, wheat, or millet colonized with mycelium), sawdust spawn (for log cultivation), and liquid culture (a syringe of mycelium suspended in nutrient broth).
Mixing Spawn with Substrate
For bulk substrates like straw or sawdust, mix the spawn thoroughly throughout the substrate at a rate of about ten to twenty percent spawn by volume. More spawn means faster colonization and lower contamination risk. Work in a clean environment: wash your hands, sanitize your work surface with rubbing alcohol, and move quickly to minimize the time the substrate is exposed to airborne contaminants. Once mixed, pack the inoculated substrate into your growing container, whether that is a monotub, grow bag, bucket, or log.
The Colonization Phase
After inoculation, place the container in a dark, warm location with temperatures between 65 and 75 degrees Fahrenheit for most species. During colonization, the mycelium grows throughout the substrate, breaking down the organic matter and building a network of thread-like cells called hyphae. You will see white, fuzzy growth spreading outward from the spawn points. Over one to three weeks, the mycelium will colonize the entire substrate, turning it a solid white color.
Do not open the container during colonization. The mycelium produces its own carbon dioxide during this phase, and the elevated CO2 levels actually promote vegetative growth. Opening the container introduces fresh air, which can trigger premature pinning and increases contamination risk. Patience during this phase is critical. If you see green, black, or orange patches developing, those are mold contamination, and the affected substrate should be discarded or composted. Small spots can sometimes be isolated by cutting away the contaminated area, but large-scale contamination means starting over.
Fruiting Conditions
Once the substrate is fully colonized, it is time to introduce fruiting conditions. This is where the magic happens. Fruiting requires a different set of environmental parameters than colonization: lower CO2, higher humidity, indirect light, and slightly cooler temperatures.
Humidity
Mushrooms are ninety percent water, so humidity is critical during fruiting. Most species require eighty-five to ninety-five percent relative humidity to form healthy fruiting bodies. Without adequate humidity, mushroom pins will dry out, crack, or abort. The simplest way to maintain humidity is to mist the growing area with a spray bottle several times a day. A more reliable approach is to use a humidity tent, which is simply a clear plastic bag or sheet draped over the growing container to trap moisture. For serious growers, an ultrasonic humidifier connected to a humidity controller provides automated, consistent humidity.
The squeeze test applies here too: the substrate should remain moist but not waterlogged. If you see pooling water at the bottom of your growing container, increase air exchange. Standing water breeds bacteria and can cause mushrooms to rot at the base. If the substrate surface looks dry or the mushroom edges are cracking, increase misting frequency or improve your humidity enclosure.
Temperature
Temperature requirements vary by species. Oyster mushrooms fruit best between 55 and 65 degrees Fahrenheit for grey varieties and 65 to 75 degrees for pink and golden varieties. Shiitake prefers 50 to 70 degrees. Lion's mane fruits best between 55 and 65 degrees. In general, a slight temperature drop from the colonization phase triggers the mushroom to transition from vegetative growth to fruiting. If you can lower the temperature by five to ten degrees when introducing fruiting conditions, you will get faster and more prolific pinning.
Light
Mushrooms do not photosynthesize, but they do need some indirect light to develop properly. Light acts as a signal for mushrooms to grow toward open air, which helps them develop properly shaped caps and stems. A few hours of indirect natural light from a north-facing window or a low-wattage fluorescent or LED light set on a twelve-hour cycle is sufficient. Direct sunlight is too intense and will dry out the growing area. A basement with a single window or a closet with a small grow light works perfectly.
Air Exchange
Fruiting mushrooms produce carbon dioxide and need fresh air to develop properly. High CO2 levels cause mushrooms to develop long, spindly stems with tiny caps, a condition called etiolation. This is especially problematic for oyster mushrooms, which need abundant fresh air to form their characteristic fan-shaped caps. Ensure your growing area has passive airflow through small openings or use a small fan on a low setting pointed away from the growing area. You want gentle air movement, not a direct breeze that would dry out the mushrooms.
Harvesting Mushrooms
Knowing when and how to harvest is crucial for quality and for encouraging additional flushes of growth.
When to Harvest
Each mushroom variety has its ideal harvest stage. Oyster mushrooms should be harvested when the caps are fully expanded but still curled slightly downward at the edges. If the caps flatten out completely or begin to curl upward, the mushrooms are past prime and will start dropping spores, which can trigger allergies in some people and reduce the viability of future flushes. Shiitake are ready when the caps are open but the edges are still slightly rolled under. Lion's mane should be harvested when the spines are well-developed and the mushroom starts to yellow slightly at the tips.
How to Harvest
Twist and pull the entire cluster off the substrate rather than cutting individual mushrooms. This removes the stumps, which can rot and invite contamination. For shiitake on logs, cut the stems cleanly at the log surface with a knife. After harvesting, clean off any substrate particles with a soft brush or damp cloth. Do not wash mushrooms under running water unless you plan to cook them immediately, as they absorb water quickly and become soggy.
Encouraging Multiple Flushes
Most substrates will produce two to four flushes of mushrooms before they are exhausted. After harvesting, rehydrate the substrate by soaking it in cold water for twelve to twenty-four hours. This mimics the natural rain event that triggers mushroom fruiting in the wild. After soaking, drain excess water and return the substrate to fruiting conditions. The second flush usually appears within seven to fourteen days and is often nearly as productive as the first. Subsequent flushes tend to be smaller, but you can keep harvesting until the substrate stops producing.
Common Problems and Solutions
Even experienced growers run into issues. Here is a troubleshooting guide for the most common problems you will encounter.
| Problem | Likely Cause | Solution |
|---|---|---|
| Green mold (Trichoderma) | Contaminated substrate or spawn | Improve sterilization, use cleaner spawn source, work in sanitary conditions |
| Pins form but abort | Humidity too low or airflow too high | Increase misting, reduce direct fan exposure, use humidity tent |
| Long stems, tiny caps | Insufficient fresh air exchange | Increase ventilation, open more holes in monotub, add gentle fan |
| Dry, cracked mushroom edges | Humidity below 80% | Mist more frequently, improve humidity enclosure |
| No pinning after full colonization | Missing fruiting trigger | Lower temperature, increase light exposure, introduce fresh air, cold shock |
| Fuzzy white growth on substrate surface | Excess CO2, aerial mycelium | This is normal; increase fresh air exchange to trigger pinning |
| Mushrooms smell sour or foul | Bacterial contamination | Discard substrate, improve pasteurization and handling hygiene |
| Fruit flies around growing area | Exposed substrate or old mushrooms | Use fine mesh over air holes, remove spent substrate, set traps |
Health Benefits of Mushrooms
Mushrooms are not just delicious; they are nutritional powerhouses that have been used medicinally for thousands of years. Modern science is now confirming many of the health claims that traditional medicine has long attributed to certain species.
Nutritional Value
Most edible mushrooms are low in calories, fat-free, and rich in protein, fiber, B vitamins, and minerals like selenium, copper, and potassium. They are one of the few non-animal sources of vitamin D when exposed to UV light during or after growing. A single serving of fresh mushrooms provides meaningful amounts of niacin, riboflavin, pantothenic acid, and phosphorus. The combination of high protein and low calorie content makes mushrooms an excellent food for anyone watching their weight while trying to maintain adequate nutrition.
Immune Support
Many mushroom species contain beta-glucans, complex polysaccharides that stimulate the immune system. Beta-glucans activate macrophages, natural killer cells, and other immune components that help the body fight infections and abnormal cell growth. Shiitake, maitake, and reishi are particularly well-studied for their immune-modulating properties. While eating culinary mushrooms provides some benefit, concentrated extracts and supplements are often used for more targeted immune support. Growing your own mushrooms ensures maximum freshness and nutrient retention.
Cognitive Health
Lion's mane has attracted particular attention for its potential to support brain health. Research has identified compounds called hericenones and erinacines in lion's mane that may stimulate the production of nerve growth factor, a protein essential for the growth and maintenance of neurons. Preliminary human studies have shown improvements in cognitive function among older adults who took lion's mane supplements regularly. While more research is needed, the early results are promising, and the fact that this remarkable mushroom tastes like lobster makes it easy to incorporate into your regular diet.
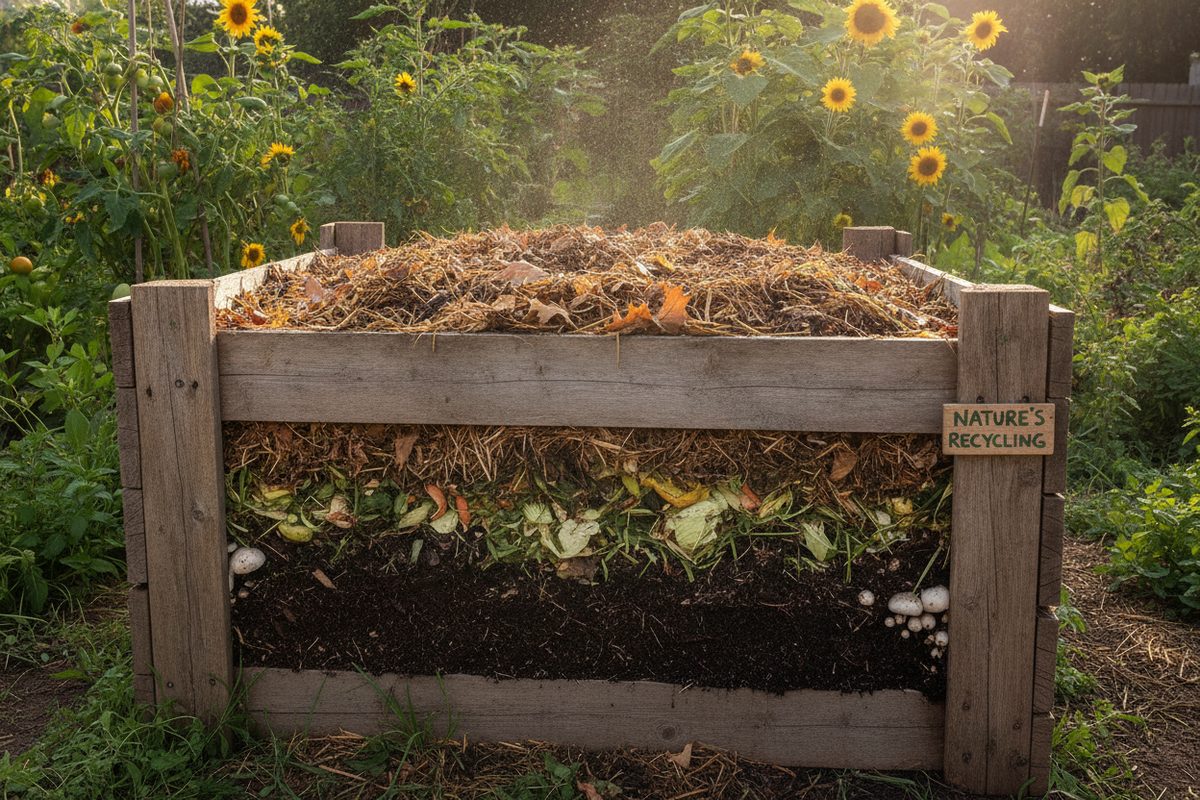
Growing mushrooms at home also pairs well with other wellness-focused gardening activities. If you are interested in composting at home, spent mushroom substrate makes an excellent addition to your compost pile or can be used directly as a soil amendment in your garden beds. The connection between growing your own food and overall health is well documented, and mushrooms are a wonderful addition to a self-sufficient kitchen alongside herbs, vegetables, and other homegrown foods.
Frequently Asked Questions
What is the easiest mushroom to grow at home?
Oyster mushrooms are widely considered the easiest mushroom to grow at home. They are aggressive colonizers that tolerate a wide range of substrates and growing conditions, they fruit prolifically, and they are resistant to many common contamination issues. Grey oyster mushrooms are the most forgiving variety and will produce mushrooms on straw, coffee grounds, cardboard, or even shredded paper with minimal equipment. If you have never grown mushrooms before, start with oyster mushrooms and you will almost certainly have success on your first attempt.
Do I need a dark room to grow mushrooms?
No. While mushrooms do not need sunlight for energy the way plants do, they do need some indirect light to develop properly. Light signals to the mushroom that it has reached the surface of its substrate and should begin forming a fruiting body. A room with a north-facing window, a basement with a standard light bulb on a timer, or even a closet with a small LED grow light all provide adequate light for mushroom growing. Avoid direct sunlight, which can overheat and dry out your growing area.
How long does it take to grow mushrooms from start to finish?
It depends on the species and method. With a pre-colonized kit, you can harvest mushrooms in as little as seven to fourteen days after opening the kit. From grain spawn on straw, oyster mushrooms typically take three to four weeks total: one to two weeks for colonization and one to two weeks for fruiting. Shiitake on logs take much longer: six to twelve months for initial colonization, but then produce mushrooms for three to five years. Lion's mane on sawdust blocks takes four to six weeks from inoculation to first harvest.
Can I grow mushrooms in my kitchen?
Yes, the kitchen is a great place to grow mushrooms, especially if you use a kit or a small container method like the coffee grounds approach. The kitchen typically has moderate humidity from cooking, indirect light from windows, and temperatures in the sixty-five to seventy-five degree range that many species enjoy. Place your growing container on a counter away from direct sunlight and heat sources, mist it twice daily, and you should have mushrooms within a couple of weeks. For larger operations or species that need cooler temperatures, a basement, garage, or dedicated grow room is preferable.
Is it safe to grow mushrooms at home?
Yes, growing edible mushrooms at home is perfectly safe when you use quality spawn from a reputable supplier. Never consume wild mushrooms unless you are one hundred percent certain of their identification, as many poisonous species closely resemble edible ones. Home-grown mushrooms from purchased spawn are exactly the same species sold in grocery stores and restaurants. The substrate materials (straw, sawdust, coffee grounds) are non-toxic, and the white mycelium growth you see during colonization is the same organism that produces the mushrooms. If you see unusual colors like green, black, or orange during colonization, that is mold contamination, and you should discard that substrate, but even those molds are generally not dangerous to touch, just not something you want to eat.