Introduction
Water is the lifeblood of every garden, but how you deliver that water matters just as much as how much you give. If you have ever stood in the summer heat with a hose, watching water pool on the surface and run off into the street, you already know the frustration of inefficient watering. Overhead sprinklers lose up to 50 percent of water to evaporation and wind drift. Hand watering is time-consuming and inconsistent. There is a better way, and it does not require a professional landscaper or a massive budget.
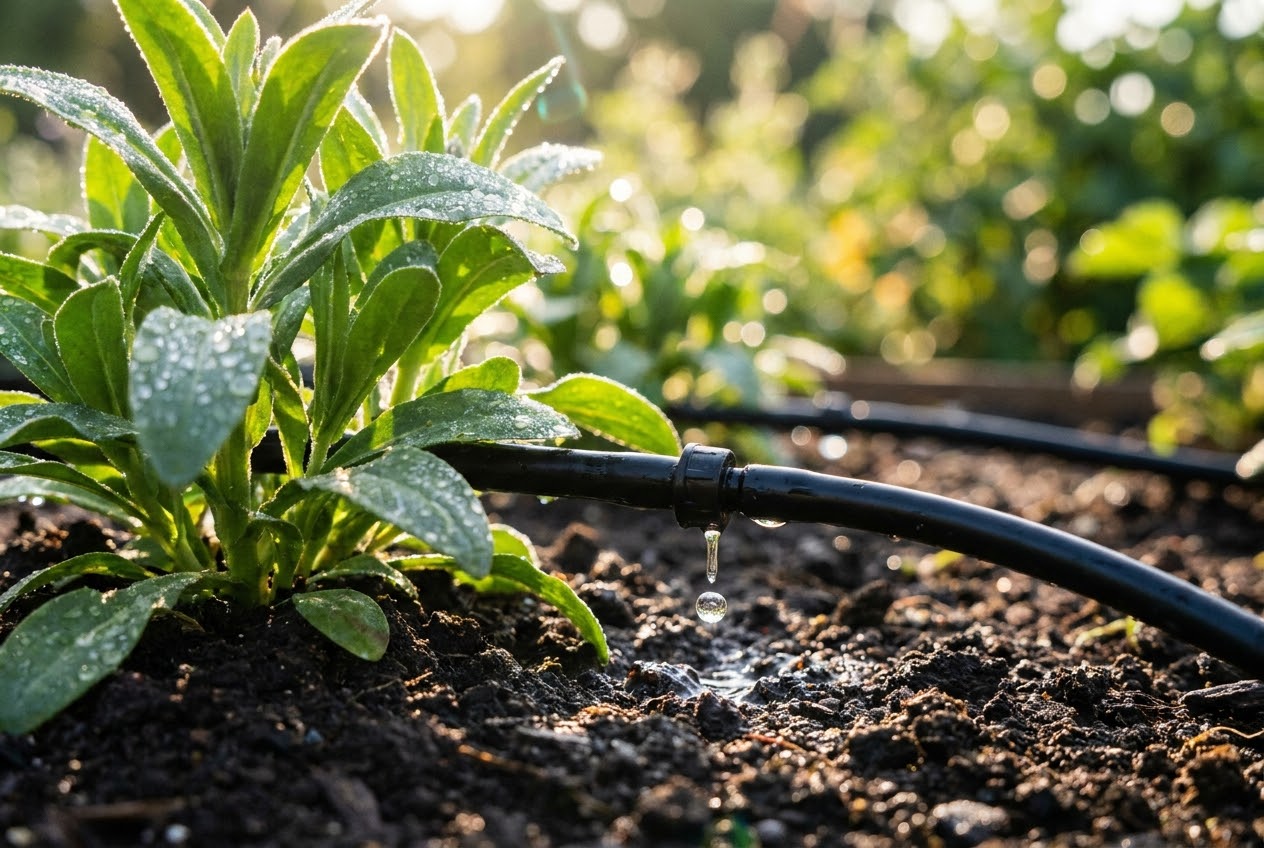
A DIY drip irrigation system delivers water slowly and directly to the root zone of each plant, right where it is needed most. It reduces water use by 30 to 50 percent compared to conventional methods, minimizes weed growth by keeping surrounding soil dry, prevents fungal diseases by avoiding wet foliage, and once installed, practically runs itself. What used to take an hour of dragging hoses now happens automatically while you drink your morning coffee.
This guide will walk you through building a complete drip irrigation system from scratch. We will cover every component you need, how to plan your layout, the step-by-step installation process, how to adjust flow rates for different plants, connecting to a rain barrel for a fully sustainable setup, and how to maintain and winterize your system so it lasts for years. Whether you are irrigating a small raised bed garden or a sprawling vegetable plot, the principles are the same, and the project is well within reach of any weekend gardener.
Why Choose Drip Irrigation?
Before diving into the nuts and bolts, it is worth understanding exactly why drip irrigation is considered the gold standard for garden watering by horticulturists, commercial growers, and water conservation experts alike.
Water Efficiency
Drip irrigation achieves 90 to 95 percent water application efficiency, meaning nearly every drop reaches the root zone. Compare that to overhead sprinklers, which typically operate at 50 to 70 percent efficiency, and hand watering, which varies wildly depending on the person holding the hose. In regions facing water restrictions or drought conditions, this efficiency is not just environmentally responsible, it can be the difference between keeping your garden alive and losing it. If you are interested in broader water conservation strategies, our guide on rainwater harvesting pairs perfectly with a drip system.
Healthier Plants
When water is applied directly to the soil at the base of plants, foliage stays dry. This dramatically reduces the incidence of fungal diseases like powdery mildew, blight, and leaf spot, which thrive in moist conditions. Consistent, slow watering also encourages deeper root growth, producing stronger, more drought-resilient plants. Tomatoes, peppers, squash, and cucumbers, all prone to foliar diseases, respond particularly well to drip irrigation.
Less Weeding
Because drip emitters only wet a small area around each plant, the soil between rows and between plants stays relatively dry. Weed seeds in those dry areas do not germinate, which can reduce your weeding time by half or more. This is one of those benefits that does not show up in water efficiency calculations but makes a huge difference in your day-to-day gardening experience.
Time Savings
Once a drip system is installed and connected to a timer, watering becomes completely automatic. No more dragging hoses, moving sprinklers, or worrying about whether you watered long enough. During peak summer, when gardens need daily watering, this automation is liberating. Combined with the right garden setup, drip irrigation makes maintaining a productive garden far less labor-intensive.
Drip Irrigation Components You Will Need
A drip irrigation system is modular, meaning you buy the pieces that fit your specific garden and connect them together. Here is a breakdown of every component, what it does, and what to expect in terms of cost.
| Component | Purpose | Cost Estimate | Options |
|---|---|---|---|
| Timer | Automates watering schedule; turns system on and off at set times | $25–$60 | Battery-operated digital, solar-powered, smart Wi-Fi timers |
| Backflow Preventer | Prevents irrigation water from siphoning back into your home water supply | $8–$20 | Atmospheric vacuum breaker (most common), pressure vacuum breaker |
| Filter | Removes sediment and debris that could clog emitters | $6–$15 | 150-mesh screen filter (standard), disc filter (for well water) |
| Pressure Regulator | Reduces household water pressure (typically 40–80 PSI) to the 20–30 PSI that drip systems require | $8–$15 | Inline preset (25 PSI most common), adjustable models |
| Main Tubing (1/2") | The main supply line that carries water from the faucet to the garden area | $15–$30 per 100 ft | Polyethylene (standard), vinyl (more flexible), brown or black |
| Distribution Tubing (1/4") | Smaller lines that branch off the main tubing to reach individual plants | $8–$15 per 100 ft | Polyethylene micro tubing, soaker dripline (pre-installed emitters) |
| Emitters | Release water at a controlled rate directly to plant roots | $5–$15 per pack of 25–50 | 0.5 GPH, 1 GPH, 2 GPH (adjustable or pressure-compensating) |
| Connectors & Fittings | Join tubing sections, create tees, elbows, and end caps | $10–$25 per assortment | Barbed connectors (push-in), compression fittings, figure-8 end closures |
| Stakes & Hold-downs | Secure tubing in place along rows and around beds | $5–$10 per pack of 25 | Galvanized stakes, plastic U-pins, tubing clips |
| Punch Tool | Creates precise holes in main tubing for inserting emitters and connectors | $4–$8 | Manual punch (included in many kits), ergonomic pistol-grip style |
For a typical garden of 200 to 400 square feet, expect to spend between $50 and $120 on a complete DIY drip irrigation system. Pre-assembled kits are available for $40 to $100 and include most of what you need, though you may need additional tubing, emitters, or fittings for your specific layout. The investment pays for itself quickly through reduced water bills and healthier, more productive plants.
Planning Your Drip Irrigation Layout
A well-planned layout is the difference between a system that works beautifully and one that frustrates you from day one. Take 30 minutes with a tape measure and a piece of paper before you buy a single fitting.
Map Your Garden
Sketch your garden from above, including the location of your water source (outdoor faucet or rain barrel), every bed or row, and the approximate distances involved. Note which plants need more water (tomatoes, squash, cucumbers) and which need less (herbs, root vegetables, drought-tolerant flowers). This map will guide your tubing runs and help you determine how many emitters and what flow rates you need.
Determine Water Needs by Zone
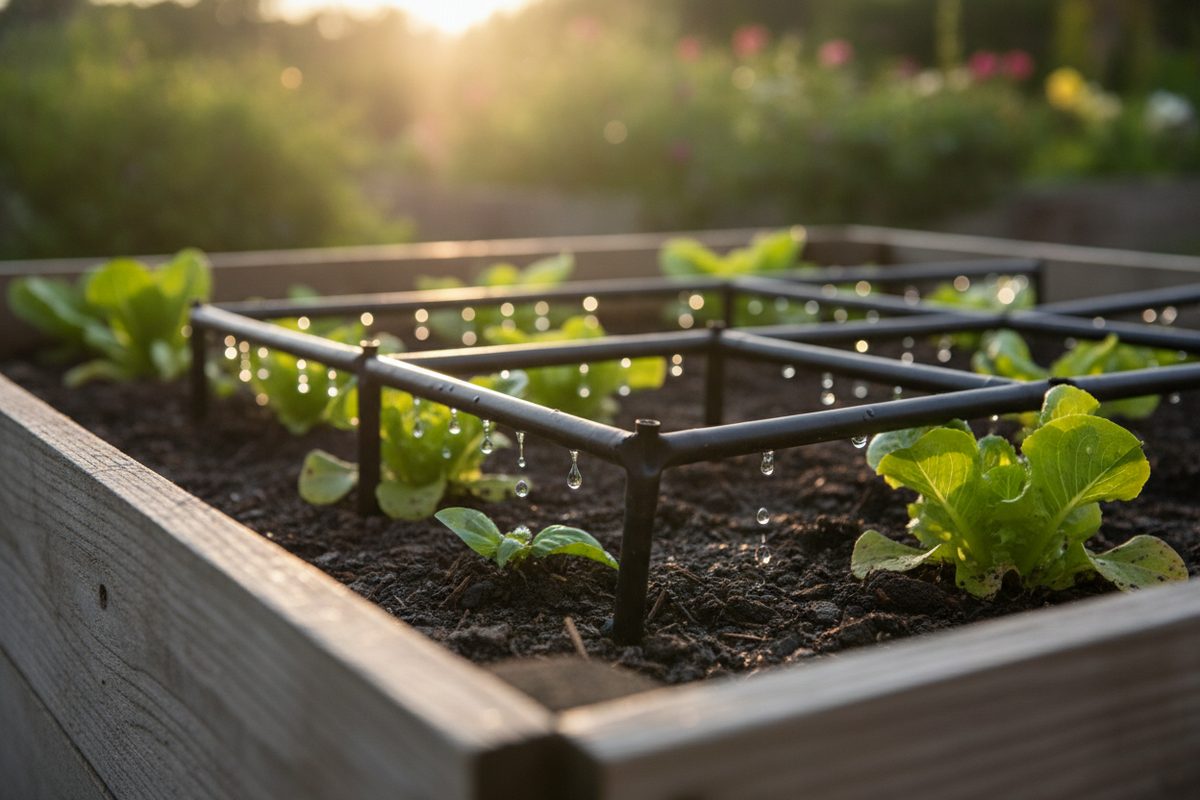
Group plants with similar water requirements together. Heavy feeders like tomatoes and peppers should be on one zone, while Mediterranean herbs like rosemary and thyme should be on another. This allows you to run each zone for a different duration. If you are working with raised beds, each bed can be its own zone, which simplifies the layout considerably.
Calculate Flow Rate
Check your faucet flow rate by timing how long it takes to fill a 5-gallon bucket. Most home faucets deliver 5 to 10 gallons per minute. Each emitter uses 0.5 to 2 gallons per hour, so a system with 50 emitters at 1 GPH each uses about 50 gallons per hour, well within the capacity of even a modest faucet. The key is not to exceed your faucet's flow rate at any given time, which is rarely a concern for home gardens.
Choose Your Tubing Path
Run the 1/2-inch main tubing along the edge of your garden or down the center of your rows. From this mainline, branch off with 1/4-inch micro tubing to reach individual plants. Keep runs as short as possible to maintain consistent pressure. If your garden is more than 100 feet from the faucet, consider running a standard garden hose to the garden edge and transitioning to drip tubing there.
Step-by-Step Installation
With your plan in hand and components gathered, the installation itself is straightforward. Set aside a Saturday morning, and you will likely be done by lunch.
Step 1: Assemble the Head Assembly
The head assembly connects to your outdoor faucet and includes, in this order: the timer, the backflow preventer, the filter, the pressure regulator, and the adapter to your main tubing. Thread each component hand-tight, then use pliers for a quarter-turn more. Wrap threaded connections with Teflon tape to prevent leaks. This assembly is the control center of your system and takes about 10 minutes to put together.
Step 2: Lay Out the Main Tubing
Unroll the 1/2-inch polyethylene tubing and lay it along your planned route. In warm weather, the tubing will be pliable and easy to work with. In cold weather, let it sit in the sun for 30 minutes to soften. Secure the tubing with stakes every three to four feet and at every turn. Use your hand to straighten out any kinks or curls. Cut the tubing with pruning shears or a utility knife at the end of each run and cap it with an end clamp or figure-8 closure.
Step 3: Install Emitters
Using the punch tool, make a hole in the side of the main tubing at each plant location. Push the barbed end of an emitter into the hole until it snaps firmly in place. For widely spaced plants like tomatoes or peppers, use individual emitters placed directly at the base of each plant. For closely planted crops like lettuce, carrots, or beans, consider using emitter tubing (1/4-inch tubing with pre-installed emitters every 6, 9, or 12 inches) laid along the row. The spacing you choose depends on your soil type: sandy soil needs emitters closer together (6 inches), while clay soil can space them further apart (12 inches or more) because water spreads laterally more in clay.
Step 4: Connect Distribution Lines
For plants that are not directly adjacent to the main tubing, run 1/4-inch micro tubing from the mainline to the plant. Insert a barbed connector into the hole you punched in the main tubing, attach the micro tubing, and run it to the plant base. Secure with a stake. At the end of each micro tubing line, attach an emitter or a small drip stake. This branching approach gives you complete flexibility to reach any plant in the garden.
Step 5: Cap All Ends
Every open end of tubing must be capped or clamped to maintain pressure. Use figure-8 end closures, which are cheap and easy to install: just fold the tubing end over and slide the figure-8 clamp on. Alternatively, use goof plugs to seal any holes you punched by mistake. A system with open ends will have no pressure at the far emitters and will leak water everywhere.
Step 6: Test the System
Turn on the water slowly and walk the entire system, checking every connection, emitter, and end cap for leaks. Look for emitters that are not dripping or are dripping too fast. Check that water is reaching the end of every run. Fix any issues before setting your timer. This initial test run should last at least 15 to 20 minutes to give you a clear picture of how the system performs under normal operating conditions.
Step 7: Set Your Timer
Program your timer for early morning watering, ideally between 5 and 8 AM. Morning watering allows foliage to dry before evening (relevant for any overhead overspray) and reduces evaporation compared to midday watering. Start with 30 minutes per session for established gardens and adjust based on how the soil feels. Sandy soils may need shorter, more frequent sessions, while clay soils benefit from longer, less frequent watering that allows deep penetration. For more watering strategies, check our guide on efficient watering techniques.
Adjusting Flow Rates for Different Plants
Not all plants drink the same amount. A mature tomato plant in July needs far more water than a row of basil seedlings in April. Your drip system should accommodate these differences.
Emitter Selection
Emitters come in standard flow rates: 0.5 GPH (gallons per hour), 1 GPH, 2 GPH, and 4 GPH. Use lower-flow emitters for small plants, herbs, and shallow-rooted crops. Use higher-flow emitters for large, thirsty plants like tomatoes, squash, and melons. Pressure-compensating emitters deliver a consistent flow rate regardless of pressure changes along the line, which is important for sloped gardens or long runs. They cost slightly more but are worth the investment for reliable performance.
Adjustable Emitters
Some emitters have a dial or twist top that lets you adjust the flow from zero to full. These are useful for gardens with mixed plantings or for gardeners who like to fine-tune watering. The downside is that they are not pressure-compensating, so flow can vary along the line. For most home gardens with relatively flat terrain and short runs, this is not a significant issue.
Run Time Adjustments
Rather than changing emitters, you can adjust watering duration per zone. Run your heavy-watering zone for 45 minutes and your low-watering zone for 20 minutes. If your timer has multiple programs or zones, this is easy to set up. If you have a single-zone system, group plants by water need and err on the side of slightly more water, since you can always skip a session if the soil is still moist.
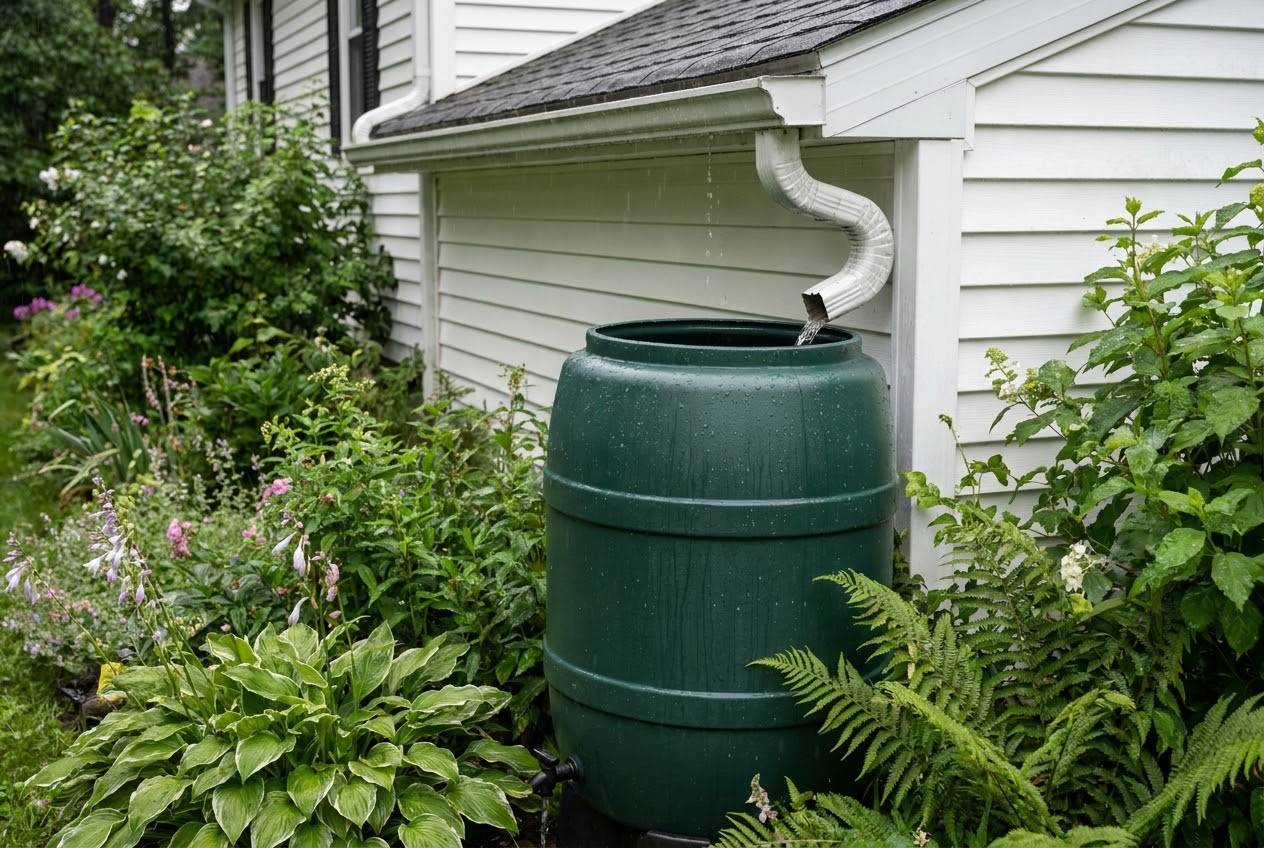
Connecting to a Rain Barrel
One of the most rewarding combinations in sustainable gardening is linking your drip irrigation system to a rain barrel. Instead of using treated municipal water, you irrigate with free, soft, chemical-free rainwater collected from your roof.
Gravity-Fed Considerations
Rain barrels deliver water at low pressure, typically 5 to 10 PSI when elevated two to three feet off the ground. This is enough for a drip system, but you need to make some adjustments. Use larger-diameter tubing (1/2-inch mainline) to minimize pressure loss. Choose low-flow emitters (0.5 GPH) that perform well at low pressure. Keep tubing runs short, no more than 50 feet from the barrel. Position the barrel as high as practical to maximize gravity pressure. Every additional foot of elevation adds roughly 0.43 PSI.
Connecting the Barrel
Most rain barrels have a spigot near the bottom. Connect a short garden hose or adapter from the spigot to your 1/2-inch main tubing. You will not need a backflow preventer (since the barrel is not connected to your municipal supply), but you should still use a filter to catch any debris or sediment that washed off your roof. Skip the pressure regulator since the barrel's gravity pressure is already well below the 20 to 30 PSI that drip systems are designed for.
Supplementing with Municipal Water
In dry spells, your rain barrel may run empty. You can install a simple Y-adapter at your faucet that lets you switch between rain barrel and municipal water, or install an automatic refill valve that draws from the faucet when the barrel level drops below a set point. Our complete guide to rainwater harvesting for beginners covers barrel selection, sizing, and connecting multiple barrels for greater capacity.
Maintenance and Seasonal Care
A drip irrigation system is low-maintenance, but neglect will shorten its life and reduce its effectiveness. A few minutes of attention each month keeps everything running smoothly.
Monthly Maintenance
- Flush the filter. Unscrew the filter housing, remove the screen, rinse it under running water, and reinstall. A clogged filter reduces system pressure and can starve downstream emitters.
- Check emitters. Walk the system while it is running and look for clogged, leaking, or missing emitters. Mineral deposits can block emitter openings, especially in hard water areas. Soak clogged emitters in vinegar for a few hours, then flush with water.
- Inspect tubing. Look for kinks, cracks, or damage from UV exposure, foot traffic, or garden tools. Replace damaged sections promptly.
- Flush the lines. Open the end caps and let water run through the main tubing for a few minutes to flush out any accumulated sediment. This simple step prevents most clogging issues.
Mid-Season Check
Around midsummer, do a thorough system audit. Check that emitters are still positioned at plant bases (plants grow and shift). Add emitters for new plantings. Adjust run times upward as temperatures rise and plants mature. If you notice dry spots, you may need additional emitters or longer run times in those areas.
Winterizing Your System
In regions where temperatures drop below freezing, winterizing your drip system is essential to prevent damage from expanding ice.
- Shut off the water supply and disconnect the timer. Remove batteries from battery-operated timers and store them indoors.
- Drain all water from the system. Open end caps and let gravity drain the lines. Blow out remaining water with compressed air set to no more than 30 PSI (higher pressure can damage emitters and fittings).
- Remove and store the head assembly (timer, backflow preventer, filter, pressure regulator) indoors for the winter.
- Cover exposed tubing with mulch or straw if you plan to leave it in place. UV-degraded tubing should be replaced in spring rather than reused.
Spring Startup
In spring, reconnect the head assembly, replace the filter screen if it shows wear, install fresh batteries in the timer, and run the system for 30 minutes while inspecting every section. Replace any cracked fittings, clogged emitters, or sun-damaged tubing before the growing season begins.
Troubleshooting Common Problems
Even well-built systems develop issues over time. Here are the most common problems and their solutions.
Low Pressure at the End of the Line
This usually means too many emitters on one run, tubing that is too long, or a partially clogged filter. Reduce the number of emitters, split the run into two zones, or clean the filter. Pressure-compensating emitters can also help by delivering consistent flow even when pressure drops along the line.
Clogged Emitters
Mineral buildup, algae, and sediment are the main culprits. Soak emitters in white vinegar or a mild acid solution for several hours, then flush with clean water. If clogging is a recurring problem, upgrade to a disc filter, which provides finer filtration than a standard screen filter. For well water with high iron or mineral content, consider adding a secondary filter or treating the water before it enters the system.
Leaking Connections
Barbed connectors that leak are usually not pushed in far enough. Warm the tubing in hot water or with a heat gun to soften it, then push the barb in firmly. If the tubing has become stretched or cracked, cut off the damaged section and reinsert the connector. Compression fittings can replace barbed fittings for a more secure, tool-free connection on the mainline.
Rodent and Pest Damage
Mice, squirrels, and even some insects can chew through polyethylene tubing. If you notice unexplained leaks or water loss, inspect for chew marks. Bury tubing under a thin layer of mulch to discourage rodents. In severe cases, run tubing through PVC conduit for physical protection.
Uneven Watering
If some plants are drowning while others are dry, check emitter flow rates and spacing. Use emitters of the same flow rate within a single zone. Ensure the main tubing is large enough for the number of emitters connected. On sloped gardens, pressure-compensating emitters ensure that plants at the bottom of the slope receive the same amount of water as those at the top.
Tips for Success
After installing and maintaining drip systems for years, these are the lessons that make the biggest difference.
- Start simple and expand. A basic mainline with emitters for your most watered plants is a great starting point. Add branches and zones as you gain experience.
- Use color-coded tubing if you have multiple zones. It makes identifying lines much easier during maintenance.
- Keep spare parts on hand. A bag of emitters, a few connectors, a punch tool, and some end caps cost almost nothing and save you a trip to the hardware store when something needs fixing mid-season.
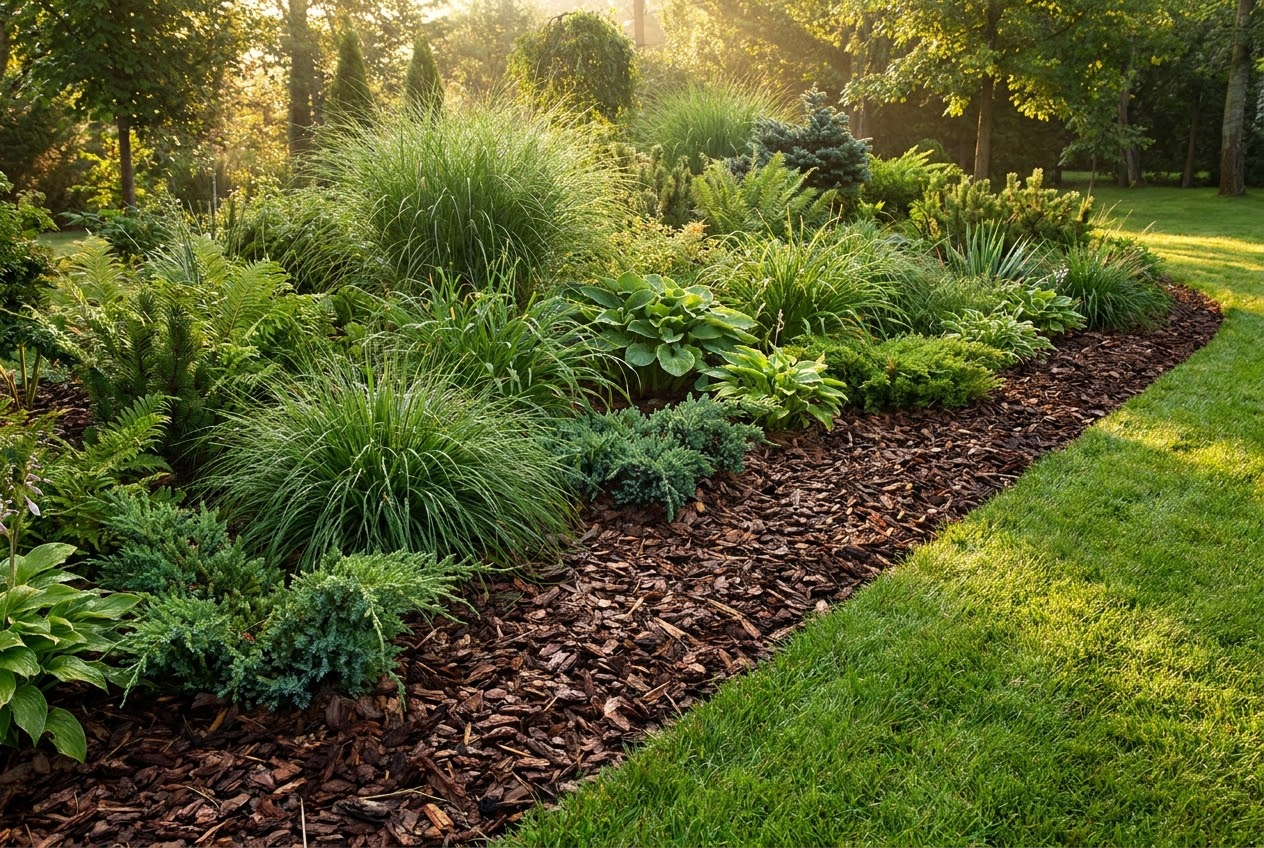
- Mulch over your tubing. A two-to-three-inch layer of organic mulch protects tubing from UV degradation, reduces evaporation, and keeps soil temperature stable. It also hides the tubing for a cleaner look.
- Label your zones. Small tags or flagging tape on the main tubing where each zone begins saves time when adjusting watering schedules.
- Combine with healthy soil. Amended soil with good organic matter retains moisture longer, which means your drip system runs less often. Our guide on soil testing and amendment helps you build soil that works with your irrigation system rather than against it.
Frequently Asked Questions
How long should I run my drip irrigation system?
Run time depends on emitter flow rate, plant needs, soil type, and weather. A general starting point is 30 to 45 minutes per session for 1 GPH emitters in garden beds. Sandy soils may need two shorter sessions per day, while clay soils benefit from one longer session every two to three days. Check the soil two to three inches below the surface after watering; if it is moist, your run time is appropriate. Adjust seasonally as temperatures and plant sizes change.
Can I use drip irrigation in containers?
Absolutely. Drip irrigation works excellently for container gardens. Use 1/4-inch micro tubing from your mainline to each pot, ending with a small emitter or drip stake. Containers dry out faster than in-ground beds, so you may need to run the system twice daily in hot weather. Use 1 GPH emitters for medium pots and 2 GPH for large containers. This is especially useful for patios, decks, and balconies where hand watering dozens of individual pots is tedious.
Will drip irrigation work with low water pressure?
Drip systems are designed to operate at 20 to 30 PSI, which is much lower than standard household pressure. They actually perform better at moderate pressure than high pressure. If you are connecting to a rain barrel or other gravity-fed source, pressure will be very low (5 to 10 PSI), but drip systems still work if you keep runs short and use low-flow emitters. Some manufacturers make emitters specifically designed for very low pressure, which deliver consistent flow rates even at 5 PSI.
How do I prevent emitters from clogging?
Use a filter and clean it monthly. Flush the lines by opening end caps every few weeks. If you have hard water, run emitters in vinegar overnight at the end of each season. Choose quality emitters with self-flushing or turbulent flow designs, which resist clogging better than cheap alternatives. In areas with very hard water or iron-rich well water, consider a disc filter instead of a screen filter for finer particle removal.
Is drip irrigation better than soaker hoses?
For most gardens, yes. Soaker hoses seep water along their entire length, which is fine for straight rows but wasteful for irregularly spaced plants. Drip systems with individual emitters deliver water only where you want it. Soaker hoses also clog more easily and degrade faster in sunlight. However, soaker hoses are cheaper and simpler for very basic row plantings. If your garden is a few straight rows of beans or lettuce, a soaker hose may be all you need. For mixed gardens with varied spacing, drip is the superior choice.
Conclusion
A DIY drip irrigation system is one of the highest-return investments you can make in your garden. For less than the cost of a nice meal out, you get a watering solution that saves water, saves time, produces healthier plants, reduces disease, cuts down on weeding, and can run automatically all season long. The components are available at any hardware store or garden center, the installation requires no special skills or tools, and the maintenance is minimal.
Start with the basics: a timer, filter, pressure regulator, mainline tubing, and emitters for your most important plants. Get the system running and learn from it. Next season, expand to cover more of your garden, connect a rain barrel, and fine-tune your watering schedules. Within a season or two, you will have a system tailored perfectly to your garden, and you will wonder how you ever gardened without it.
Pair your drip system with good soil preparation through composting, proper pest management, and thoughtful mulching, and you will have a garden that is not only productive but also sustainable and beautiful. That is smart, modern gardening at its best.